Showing posts with label linux. Show all posts
Showing posts with label linux. Show all posts
Monday, March 27, 2017
What is Kali Linux
What is Kali Linux
Kali Linux is an advanced Penetration Testing and Security Auditing Linux Distribution, based on Debian development standards. Kali Linux- a complete re-built of Backtrack Linux, was developed by Offensive Security. Kali Linux is completely open source and come free of cost. It offers more than 300 penetration testing tools with timely security updates, support for the ARM architecture, a choice of four popular desktop environments and seamless upgrades to newer versions. Kali Linux is distributed in 32-bit and 64-bit images for use on hosts based on the x86 processor architecture, as well as an image for the ARM architecture for use on the Raspberry Pi computer, rk3306 mk/ss808, ODROID U2/X2 and on Samsungs ARM Chromebook.
Earlier release of Kali Linux:
Kali 1.0.2 – 27th March, 2013 – Minor Bugfix Release and update roll-up.
Kali 1.0.1 – 14th March, 2013 – Minor Bugfix Release.
Kali 1.0 – 13th March, 2013 – Initial release.
Available link for download
Saturday, March 25, 2017
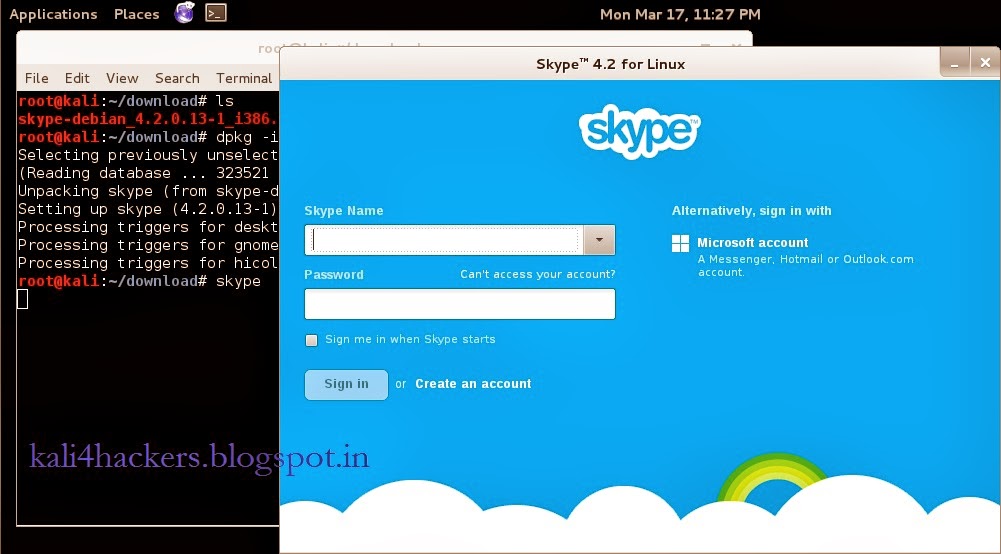
Installing Skype in Kali Linux
Installing Skype in Kali Linux
Before you proceed make sure that you run apt-get update from terminal. Check the necessary repository in sources.list file. For more please read this post.
STEPS:
1. Goto www.skype.com and click on Downloads.
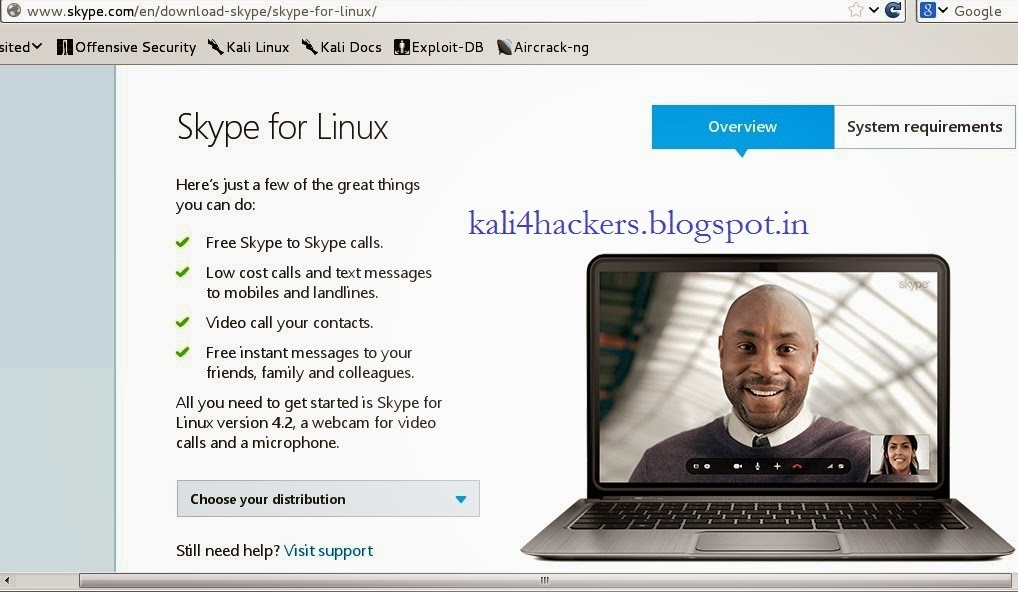
2. Being a Kali Linux user, select Choose your distribution as debian and click Save File to download.
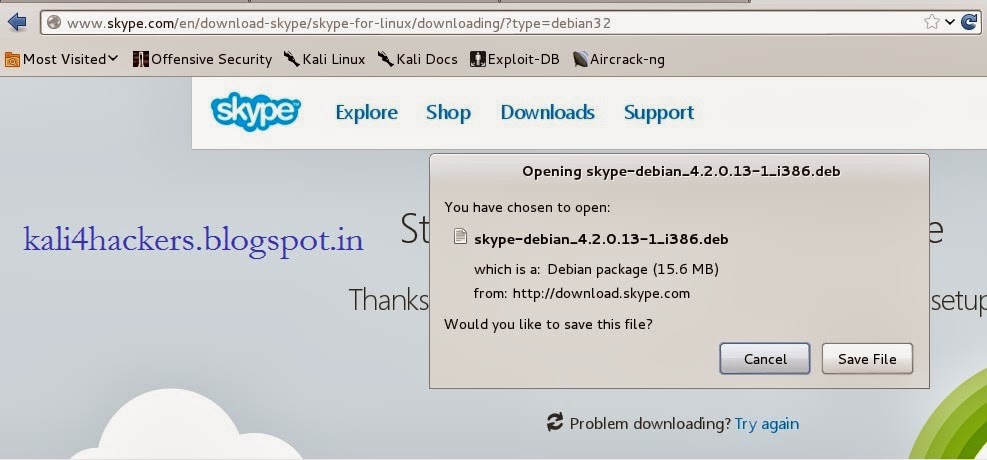
3. Open terminal and locate the downloaded file.
4. Run dkpg -i skype-debian_x.x.x.x_i386.deb (where x is the version of skype) to install the package.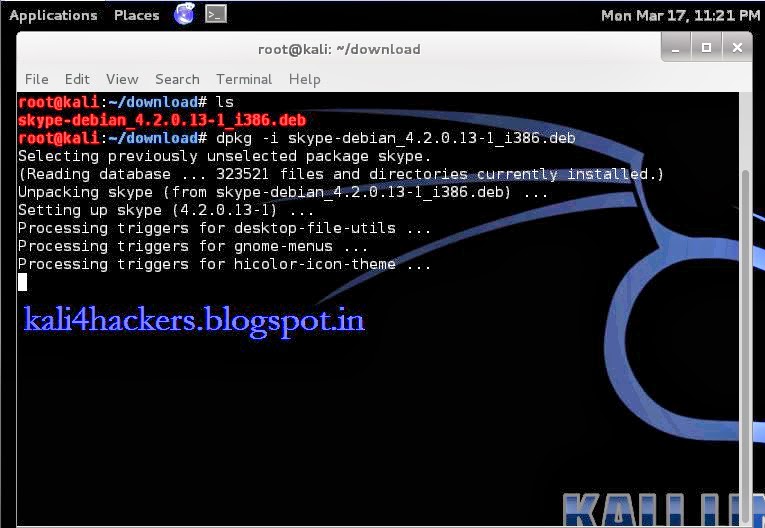
STEPS:
2. Being a Kali Linux user, select Choose your distribution as debian and click Save File to download.
3. Open terminal and locate the downloaded file.
4. Run dkpg -i skype-debian_x.x.x.x_i386.deb (where x is the version of skype) to install the package.
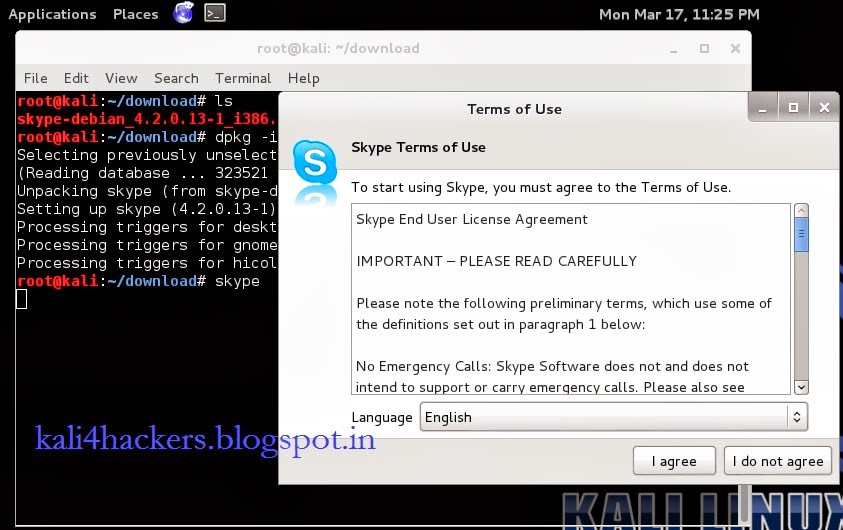
5. Type skype to run the program.
6. Accept License agreement.
Available link for download
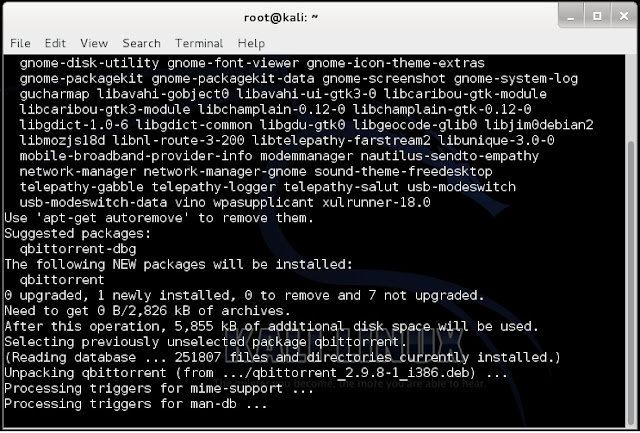
How to install qbittorrent in Kali Linux
How to install qbittorrent in Kali Linux
About qbittorrent: qbittorrent is a torrent client, an alternative to utorrent. Its a GUI based cross platform free software based on Qt toolkit.
We know that Kali Linuxs base package is constructed in Debian, so we need to add http://http.packages.debian.org to sources.list file. To do this,
1. open any text editor and edit sources.list file, located in /etc/apt directory, with an entry deb http://http.packages.debian.org import deb packages.


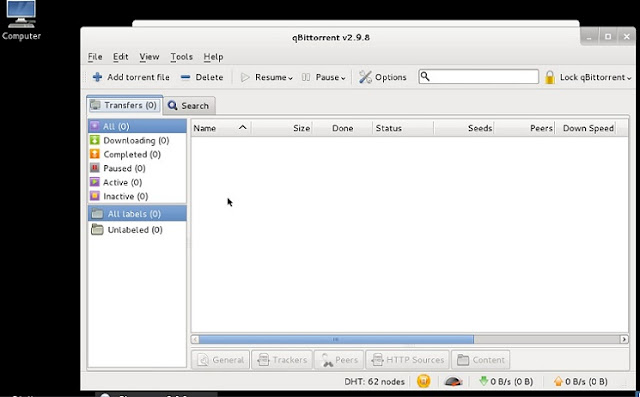
3. Once qbittorrent is installed, type qbittorrent on the root terminal window and press enter
We know that Kali Linuxs base package is constructed in Debian, so we need to add http://http.packages.debian.org to sources.list file. To do this,
1. open any text editor and edit sources.list file, located in /etc/apt directory, with an entry deb http://http.packages.debian.org import deb packages.
2. type apt-get install qbittorrent on the root terminal window and press enter
and, you are set to go.
Available link for download
Tuesday, March 14, 2017
Removing Windows OS Passwords with CHNTPW on Kali Linux
Removing Windows OS Passwords with CHNTPW on Kali Linux

So First of all lets see which tool we are going to use
[UPDATE] If you are having any kinda problem with this method on windows 8/8.1 then try this method
Changing Windows 8/8.1 Password with CHNTPW
If you want to recover Windows 8/8.1 passwords instead of removing them see this tutorialCracking Windows 8/8.1 passwords with Mimikatz
Tool Name:- chntpwTool Description: Obviously its going to be what the man page of tool says: "chntpw is a utility to view some information and change user passwords in a Windows NT/2000 SAM userdatabase file, usually located at WINDOWSsystem32configSAM on the Windows file system. It is not necessary to know the old passwords to reset them. In addition it contains a simple registry editor (same size data writes) and hex-editor with which the information contained in a registry file can be browsed and modified."
Attack Requirements:
1. Physical Access to victims Computer.
2. A live bootable pendrive of Kali Linux.
(Download Kali Linux)
So Lets get started:
Step 1: Mounting the drive containing Windows OS-> This one is easy aint it? Well so that you might not have forgotten how to do it, Ill type the syntax:
ntfs-3g /dev/sda1 /media/win
Note that sda1 in above command is the partition on which Windows OS is installed yours can be different. To check yours simply type fdisk -l which will list your all partitions and then check by yourself on which partition your Windows OS is installed. If you cant get it this way then dont worry Im still here well then you can try doing it in GUI way. Click on Applications > Accessories > Disk Utility then select victims hard disk and see on which partition Windows OS is installed. If Windows Partition is installed on any other partition then replace sda1 in the above command with that which you found e,g sda2. Also note that if there is no such directory as win (mentioned in above command) in your /media folder then you must create one which is simple just type mkdir /media/win this command will make win folder in media folder on which youll mount victims Windows OS (It is not necessary that its name be win you can use any name).
Step 2: OK after successfully mounting Victims Windows OS now you need to move there but wait not only there instead very much deep in there. You need to move to config folder which is located in System32 folder (Note that it is Capital S in windows 7 & 8). You can move there using this command:-
cd /media/win/Windows/System32/config/ (On Windows 7 & 8)
or
cd /media/win/WINDOWS/system32/config/ (On Windows XP and those before it)
Step 3: Now is the most tough part of game (only if tough means easy :) ). Now as when you are inside the config directory type the following command to see the list of users available on Victims Machine:
chntpw -l SAM (remember it is ell not 1)

note the name of user whose password you want to clear.
Step 4: Oh man our happy journey is coming to an end now. Follow the upcoming steps to blast Victims Windows OS password:
type the command:
chntpw -u <username> SAM

Note: <username> here is the name of user you noted in the above step.
it will display different options before you.
type 1 and hit enter
type y and hit enter

Voola you busted Victims password now turn off Kali and Open Victims Windows OS without knowing His/Her Password. Bad Bad Bad...
For More Info on chntpw type this in your terminal:
man chntpw
This will display Manual Page of chntpw...
Happy Cracking... :)
Dont forget to read the Disclaimer
Available link for download
Monday, March 6, 2017
Access Kali Linux through Remote System
Access Kali Linux through Remote System
There are several open source and enterprise software program through which we can access remote system. These software becomes a necessity when you setup a remote server and do not allow direct access to the server, as because of some security measures. PuTTy is one of the major terminal emulator through which we can access a remote server. PuTTy is a free and open-source terminal emulator, serial console and network file transfer application. It supports several network protocols, including SCP, SSH, Telnet and rlogin. Here, I am going to show you how to access Kali Linux through PuTTy. My base computer is running Windows 7 and Kali Linux is installed in a VMWare Player. So we can assume that Kali Linux is installed in a remote machine, as Windows 7 and of Kali Linux is on different network now.
Before we access Kali Linux through remote system, we need to make sure that ssh service is already running in Kali Linux.
To check the status of ssh service. Open root terminal and type service --status-all

In case it shows [-], then it means ssh service is not running and you have to enable ssh service first. To do this type apt-get install openssh-server from terminal window. Once, it shows [+] sign it means service is enable. Now, we type service ssh start to run ssh service.

Once we are sure that ssh service is running in remote Kali Linux, we have to perform one more step. Run ssh-keygen -t rsa to setup rsa key for ssh authentication and enter filename and passphrase to save the key. Once this is done we are good to go.

Now open PuTTy application and type the ip address of Kali Linux (if you are not sure then type ifconfig command on Kali Linux root terminal window). Let the port no. be default, select ssh and click on open. If everything is fine then it will ask you to enter login name and password. Once you enter the correct login and password, you will get privilege to access Kali Linux from console mode.

Available link for download
Kali Linux Repositories
Kali Linux Repositories
Hi Everyone! this is an updated post on Kali Linux repositories. Well, a repository is an archival source from where Kali Linux softwares are updated and upgraded online. sources.list is the file where all the links for necessary update are saved. When we execute a command apt-get update, it searches for the updated package online. Un-wanted or un-necessary links can cause failure of Kali Linux package installation, so make sure what link/s should be added to the repository so that Kali Linux should get proper update.
Kali Linux distribution has three repositories, which are mirrored world-wide:
http.kali.org (mirrorlist): the main package repository;
security.kali.org (mirrorlist): the security package repository;
cdimage.kali.org (mirrorlist): the repository with ISO images.
On a clean installation, Kali Linux, have the following two entries present in /etc/apt/sources.list:
deb http://http.kali.org/kali kali main non-free contrib
deb http://security.kali.org/kali-security kali/updates main contrib non-free
These are called Regular repositories from where Kali Linux get its update. In case, you require additional package, then your can add valid package source. You might also want to add the following repositories as well. These are Sources repositories:
deb-src http://http.kali.org/kali kali main non-free contrib
deb-src http://security.kali.org/kali-security kali/updates main contrib non-free
Finally, do not forget to do an update Kali Linux on terminal by typing apt-get update && apt-get upgrade && apt-get dist-upgrade.
Suggestion from Mr. Phong Do. Mr. Phong Do, made a change by just replacing "http:" with "deb" and found update is much faster. Hi all, please check and update me in comments so that I can update the post accordingly. THANKS.
just change http to repo like this:
deb http://repo.kali.org/kali kali main non-free contrib
just change http to repo like this:
deb http://repo.kali.org/kali kali main non-free contrib
Available link for download
Tuesday, February 21, 2017
Check Disk space in Kali Linux
Check Disk space in Kali Linux
After installing Kali Linux on hard drive or on virtual machine, we may have come across with a warning message of "Low Disk usage". It happens when we allocate insufficient disk space during partition for kali linux or else when we do a regular "update" and "upgrade" of patches or downloading softwares. Kali Linux comes with a graphical built-in tool, i.e. Disk Usage Analyzer. This tool helps you to check the disk space usage. There are other options too, to check usage as per file system.


If you need to check from terminal(for non-gui users), then there are two classic commands available for every linux distros, i.e.
(a) df: Report file system disk space usage
(b) du: Estimate file space usage
df command is used to check free disk space. You can type df -h or df -k to list free disk space. It displays statistics about the amount of free disk space on the specified file system or on the file system of which file is a part. Values are displayed in 512-byte per block counts.
du command is used to show how much space one ore more files or directories is using. Type du -sh where -s option summarize the space a directory is using and -h option provides "Human-readable" output.

Available link for download
Monday, February 20, 2017
Linux Command Line Hackery Series Part 5
Linux Command Line Hackery Series Part 5

Welcome back to the Linux Command Line Hackery series, this is Part-V of the series. Today we are going to learn how to monitor and control processes on our Linux box, so wrap your sleeves up and lets get started.
Command: ps
Syntax: ps [options]
Description: ps displays information about the currently running processes. Some of the common flags of ps are described briefly below
Flags:
-A or -e -> select all processes
-a -> select all processes except both session leaders and processes not associated with a terminal.
T -> select all processes associated with current terminal
-u <username or id> -> select all processes of a given user or userlist
Open up a terminal and type ps:
ps
what youll see is a list of processes currently running in your terminal. One important thing to notice in the output is whats called as PID which stands for process ID. It is the number that uniquely identifies a process. Just keep that PID concept in mind well use it soon.
OK I know thats not really what you want to see rather you want to see all the processes that are currently running on your box. Dont worry we have flags to rescue, in order to see all the processes you can use the -e flag like this:
ps -e
Boom! you get a long list of processes currently running on your machine (dont stare at me like that, you asked and I gave you that). If you want to see processes of a particular user you can type the following command in your terminal:
ps -u bob
here "bob" is a username. This command will list all processes of the user with effective user name of bob.
You can do a full-format listing of the processes using the -f flag like this:
ps -fu bob
But the output of the ps command is a snapshot not really a live preview of what is going on in your box. I know your next question is going to be something like this, Isnt there a command in Linux that gives me a live updating information of the processes? Yes, there is a command called top that well learn about next.
Command: top
Syntax: top [options]
Description: top gives a dynamic real-time view of a running system. That is, it gives the up-to-date information about all the processes running on your Linux box (sounds fun!). Besides giving information about current processes and threads top also provides a brief system summary.
To start top just type this command:
top
and youll get a nice and cute looking ugly display :). Well what the heck is going on here you might ask, right? What you get is information about what is going on with your computer. To see what more can you do with top just type <h> within the program window and youll be given list of options that you can play with.
OK looking at what processes are going on in your box is cool but what if you want to terminate (or close) a process, is there a command line utility for that? Yes, there is and thats what we are going to look at next.
Command: kill
Syntax: kill [options] <pid> [...]
Description: kill is used to send a signal to process which by default is a TERM signal meaning kill by default sends a signal of termination to process (Cruel guy). To list the available signals we can use the -l or -L flag of the kill command.
To simply terminate a process we provide kill command a PID (process ID) and it will send the TERM signal to the process. So to kill a process first well list the running processes and then well keep the PID of the process in mind that we want to terminate. After that well issue the kill command with the PID that we just found.
ps -ax
kill 1153
the above command will send a TERM signal to the process whose PID is 1153, as simple as that.
We can also use our already learned skills to refine the output of ps command. Say we have a xterm terminal running on our box and we want to terminate it. By using ps command all alone well get a long listing of all processes running on our box. But we can limit the output of ps command to just those processes that were interested in by piping ps command with the grep command like this:
ps -ax | grep xterm
wow! thats amazing, were able to pull out only those results from the ps command that contained xterm in them. Isnt that a cool trick? But what is that vertical bar ( | ) doing in the middle, you may be thinking, right? Remember we learned about the input and output re-directors previously, the vertical bar (pipe in geeky terms) is another re-director whose task is to redirect the output of one command as input to another command. Here the pipe redirects the output of ps -ax command as input to grep command and of-course from the previous article you know that grep is used to search for a PATTERN in the given input. That means the above command searches for the xterm word in the output of ps -ax command and then displays just those lines of ps -ax command which contain xterm. Now get that PID and kill that process.
Thats it for today, try these commands up on your own box and remember practice is gonna make you master the Linux command line. :)
Available link for download
Thursday, February 16, 2017
Make Flash USB drive Bootable for Windows XP Vista 7 8 or Linux
Make Flash USB drive Bootable for Windows XP Vista 7 8 or Linux
Making your USB Drive Bootable for Windows XP, 7 and 8 and Linux and/or based Systems.. (Links Updated)
Dear Readers, Today i will tell you about Bootable USB Stick and how to create a Bootable USB Drive, you dont need to search the internet over and over again to find the right tool for creating a bootable usb device for your needs...
Bootable USB Drive is just like a normal usb drive but it lets you boot your PC directly from USB Stick eliminating the need of a CD/DVD drive... thatll allow you to perform actions such as Installing an Operating System and / or Running Bootable Iso Files such as Antivirus Rescue Disks or Other Softwares that Run in offline mode and needed to be burned on CD/DVDs in the form of .ISO file to become operatable... There are many tools available
- Windows 7 USB/DVD Download Tool (For Windows 7 and 8): This tool is provided by Microsoft itself. There is no need to find or search the internet for any other software/tool thatll make your USB bootable. This could be used for Making Bootable Windows 7 and Windows 8 Platform USB device... It wont work for Windows XP as it lacks the Install.wim file...
NOTE: DotNET Framework 2 or higher (.Net FX) is required for this tool to work/Works best with Dot Net Framework 3.5... You can easily obtain Dot Net Framework 3.5 for Windows 7 on Microsofts official Downloads Page while you need to follow this guide to install dotnetfx3.5 for Windows 8 --> "How to Install Dot Net Framework 3.5 on Windows 8 All Editions" - Novicorp WinToFlash: Novicorp WinToFlash has always been my first choice to create bootable usb drives when it comes to Windows XP. It is very simple to use, you only need to enter the path, where you had extracted your Windows .ISO file (or mount the .ISO file and then browse to path). It is very handy tool for Windows XP, Vista, 7 and now it also supports Windows 8...
- UNetbootin: When it comes to install rescue disks on bootable usb pen drives, UNetbootin has always been my first choice because not only UNetbootin allows you to create bootable Linux based .ISO image files but it also allows you to create bootable USB Pen drives for Linux Operating Systems and its variants such as Ubuntu etc. as well... and also allows you to download .ISO Image files and Create Bootable USB device directly from within..
So, whenever you need to make a bootable USB drive, no matter which family it belongs to, all you need is above listed three free tools... Nothing else.. Enjoy and Click on Name of tool to Download requisite tool...
Tags: bootable usb ; create bootable usb disk ; bootable rescue disk ; install iso image on usb ; install windows xp/vista/7/8 from bootable usb pen drive ; install ubuntu / linux from usb ; install windows from usb
Tags: bootable usb ; create bootable usb disk ; bootable rescue disk ; install iso image on usb ; install windows xp/vista/7/8 from bootable usb pen drive ; install ubuntu / linux from usb ; install windows from usb
Available link for download
Monday, February 13, 2017
Add Repository in Kali Linux
Add Repository in Kali Linux
Kali linux is a debian base linux distribution designed for penetration testing. Here, I will give a tutorial on how to add a repository on Kali Linux 1.0.3 with ease. Repository is a archival software, where software in this archive can be retrieved by the user to use. Please click here to check for the new blog post on repository.
1. Open root terminal and type this code.
root@kali:~# leafpad /etc/apt/sources.list
2. Add all repositories, i.e. :
deb http://http.kali.org/ /kali main contrib non-free
deb http://http.kali.org/ /wheezy main contrib non-free
deb http://http.kali.org/kali kali-dev main contrib non-free
deb http://http.kali.org/kali kali-dev main/debian-installer
deb http://http.kali.org/kali kali main contrib non-free
deb http://http.kali.org/kali kali main/debian-installer
deb-src http://http.kali.org/kali kali-dev main contrib non-free
deb-src http://http.kali.org/kali kali main contrib non-free
deb-src http://security.kali.org/kali-security kali/updates main contrib non-free
Save the file and exit.
Save the file and exit.
3. root@kali:~# apt-get update
4. root@kali:~# apt-get upgrade
Available link for download
Sunday, February 12, 2017
Adjust screen resolution in Kali Linux
Adjust screen resolution in Kali Linux
1. Click on Applications --> System Tools --> Preferences --> System Settings
2. Click on Display
3. Click Drop down box, next to Resolution to adjust resolution of the monitor
4. Click on Apply to take effect
Available link for download
How to reset Windows password with Kali Linux
How to reset Windows password with Kali Linux
Download Kali Linux and burn the ISO to a CD/DVD. Boot Windows machine with the LiveCD. On the boot menu of Kali Linux, select Live (forensic mode). Kali Linux initialize and when it loads, it will open a terminal window and navigate to the Windows password database file. Almost all versions of windows password is saved in SAM file. This file is usually located under /Windows/System32/config. On your system it may look something like this: /media/hda1/Windows/System32/config. Below is the screenshot.

The SAM database is usually in the /media/name_of_hard_drive/Windows/System32/config
The screen shot below lists the SAM database file on my hard drive. The screen shot below lists the SAM database file on my hard drive.

Type command chntpw -l SAM and it will list out all the usernames that are contained on the Windows system.

The command gives us a list of usernames on the system. When we have the username we want to modify and we simply run the command chntpw -u “username” SAM
In the example below we typed: chntpw -u “Administrator” SAM and we get the following menu:

We now have the option of clearing the password, changing the password, or promoting the user to administrator. Changing the password does not always work on Windows 7 systems, so it is recommended to clear the password. Therefore you will be able to log in with a blank password. You can also promote the user to a local administrator as well.
Available link for download
Friday, February 3, 2017
TOR for Kali Linux
TOR for Kali Linux
Tor (used to stand for "The Onion Router", but its no longer considered an abbreviation, so its just "Tor"), is an anonymity network, used to surf the web (and more) anonymously. Basically, anyone running the Tor software on their computer runs a proxy, and traffic gets passed (encrypted) from one person running Tor to another person running Tor, multiple times through many users, until it gets to the page that you requested. Hence the term "Onion" used to describe it, since it works in "layers". Each person running Tor on their computer is called a "Node".
To the page (and anyone logging requests to that page, such as the website owner for example) they can only see the IP address of the last Node (called the "end node"). Any communication along the way, between you, when you request the website page, and the final destination, is encrypted, and cannot be analyzed. However, the last Node in the chain can log and view traffic through it, if the person running it is unscrupulous, so for that reason it cant be said that Tor is 100% anonymous.
TOR Auto-install Shellscript
#!/bin/sh
echo "deb http://deb.torproject.org/torproject.org wheezy main" >> /etc/apt/sources.list
clear scr
echo "[*] Installing the keys...."
gpg --keyserver keys.gnupg.net --recv 886DDD89
gpg --export A3C4F0F979CAA22CDBA8F512EE8CBC9E886DDD89 | sudo apt-key add -
echo "Ready!!"
clear scr
echo "[*] Updating Repositories...."
apt-get update
clear scr
echo "[*] Installing TOR"
apt-get install deb.torproject.org-keyring
apt-get install tor
echo "Ready!!"
echo "[*] Installing Vidalia"
apt-get install vidalia
echo "Ready!!"
echo "[*] Installing iceweasel-torbutton"
apt-get install iceweasel-torbutton
echo "Ready!!"
clear scr
echo "[*] Installing Privoxy"
apt-get install privoxy
echo "[*] Configuring privoxy"
echo "forward-socks5 / 127.0.0.1:9050 ." >> /etc/privoxy/config
echo "Ready!!"
service tor restart
service privoxy restart
echo "Tor has been installed successfully."
Save this script to a file like torinstall.sh and chmod +x it.
#chmod +x torinstall.sh
#./torinstall.sh
Available link for download
Install Kali Linux ARM on Raspberry Pi
Install Kali Linux ARM on Raspberry Pi
Before we begin, let me give you a brief introduction on Raspberry Pi. Well, a Raspberry Pi is a low budget, small credit-card sized ARM board, that acts as a computer. This board is developed by Raspberry Pi Foundation, UK with the intention of promoting the teaching of basic computer science in schools. The processor at the heart of the Raspberry Pi system is a Broadcom BCM2835 system-on-chip (SoC) multimedia processor. This means that the vast majority of the system’s components, including its central and graphics processing units along with the audio and communications hardware, are built onto that single component hidden beneath the 256 MB memory chip at the centre of the board. It’s not just this SoC design that makes the BCM2835 different to the processor found in your desktop or laptop, however. It also uses a different instruction set architecture (ISA), known as ARM. The ARM-based BCM2835 is the secret of how the Raspberry Pi is able to operate on just the 5V 1A power supply provided by the onboard micro-USB port. It’s also the reason why you won’t find any heat-sinks on the device: the chip’s low power draw directly translates into very little waste heat, even during complicated processing tasks.

Figure(1). Sketch of a Raspberry Pi Board

Figure(2). Actual view of a Raspberry Pi Board

Figure(3). Raspberry Pi Board in a box

Figure(4). Raspberry Pi Board to work as a computer
Components needed to make Raspberry Pi to a Computer are:
• Raspberry Pi board
• Micro USB lead (for power)
• USB power adapter (also for power)
• HDMI lead: Type A to Type A (to connect to your monitor or TV)
• HDMI display
• SD card: 2 GB to 64 GB (for storage); 8 GB minimum recommended
• SD card reader
• USB keyboard and mouse
Now, lets get started installing Kali Linux for Raspberry Pi.
1. Download Kali Linux for Raspberry Pi image.
2. Use dd utility to image this file to your SD card. Assumed that the storage device is located at /dev/sdb. Please note that this process will wipe out your SD card. If you choose the wrong storage device, you may wipe out your computers hard disk.
root@kali:~ dd if=kali-pi.img of=/dev/sdb bs=512k
This process can take a while depending on your USB storage device speed and image size. Once the dd operation is complete, boot up your Rasberry Pi with the SD card plugged in. You will be able to log in to Kali (root / toor) and startx.
Available link for download
Thursday, January 26, 2017
How to fix Kali Linux slow update
How to fix Kali Linux slow update
When we talk about update, we know that the client system is downloading an update and patches from the source(online- from the network resource or offline- cd/dvd or any other secondary source). Here, we are talking about online update only. Kali Linux is relatively new and have less mirror sites, so the less the mirror sites the more online users to access the server and utilizing all the bandwidth. When you type apt-get update on the terminal, it searches for the relative links for update from /etc/apt/sources.list. So, more the number of links in the repository file, the more time it will consume to search for an update. Below are the few necessary steps that you can perform to fix the issue.
STEPS:
1. Check if you got the right repositories in /etc/apt/sources.list. Please remove unwanted and un-necessary repositories from the sources.list. Click here for more.
2. Run apt-get clean to clear cache.
3. Run apt-get autoremove to remove un-successful installed packages.
4. Choose a fast DNS server. Click here to read this article. To add DNS server address, open terminal and type leafpad/etc/resolv.conf. Once you add the address of DNS server, save and exit the file.
Now, to keep Kali Linux up-to-date, type apt-get update, then apt-get upgrade and finally apt-get dist-upgrade.
Available link for download
Friday, January 20, 2017
CutyCapt on Kali Linux
CutyCapt on Kali Linux
Today im going to make you know about an intresting tool in Kali-Linux that is CutyCapt.
CutyCapt was written by Björn Höhrmann <bjoern@hoehrmann.de>
CutyCapt is used to capture Webkits rendering of a web page into many different Vector and Bitmap formats like JPEG, PNG, PDF and many more.
So lets Capture something::
Sample 1:

Here --url=www.moinkhan.blogspot.com specifies the target website which we want to capture and --out=/root/Desktop/output.png specifies the location of output (here it is /root/Desktop) and the name of output file (here it is output) and the format of output file (here it is .png).
Formats can also include [pdf, bmp, jpeg and many more...]
Sample 1:

here we captured the target address in PDF format using .pdf extension and also specified minimum width and height using the --min-width and --min-height options.
CutyCapt has many other options to try out like max-wait and delay time and many other things. Now as you know how to specify these options you can try them out one by one.
For more help on CutyCapt check out the help page and the manual page of CutyCapty using following commands:
man cutycapt --> to check the manual page.
cutycapt --help --> for summary of options.
Hope you Enjoyed this one... :)
CutyCapt was written by Björn Höhrmann <bjoern@hoehrmann.de>
CutyCapt is used to capture Webkits rendering of a web page into many different Vector and Bitmap formats like JPEG, PNG, PDF and many more.
Requirements:
1. Kali Linux or Any Linux with cutycapt installed.
(Download Kali Linux)
So lets Capture something::
Sample 1:
command--> cutycapt --url=www.moinkhans.blogspot.com --out=/root/Desktop/output.pngHere --url=www.moinkhan.blogspot.com specifies the target website which we want to capture and --out=/root/Desktop/output.png specifies the location of output (here it is /root/Desktop) and the name of output file (here it is output) and the format of output file (here it is .png).
Formats can also include [pdf, bmp, jpeg and many more...]
Sample 1:
command--> cutycapt --url=www.facebook.com --out=/root/Desktop/output2.pdf --min-width=400 --min-height=300here we captured the target address in PDF format using .pdf extension and also specified minimum width and height using the --min-width and --min-height options.
CutyCapt has many other options to try out like max-wait and delay time and many other things. Now as you know how to specify these options you can try them out one by one.
For more help on CutyCapt check out the help page and the manual page of CutyCapty using following commands:
man cutycapt --> to check the manual page.
cutycapt --help --> for summary of options.
Hope you Enjoyed this one... :)
Available link for download
Monday, January 16, 2017
Create Bootable USB in Kali Linux
Create Bootable USB in Kali Linux
Hi Everyone. Today I am going to show you how to create bootable usb in Kali Linux using line utility. There are several 3rd party utilities available in the market, some of them are UNetbootin, Universal USB Installer, YUMI and RMPrepUSB. These all are GUI-based utilities. But, today I am going to create a linux bootable usb using dd (device driver). dd is a simple command line program that is pre-installed in almost linux based operating systems. It is a simple, yet versatile and powerful tool. It can be used to copy from source to destination, block-by-block, regardless of their filesystem types or operating systems. Below screen-shot shows you how to create bootable usb using dd command.
Tested on: Kali Linux 1.1.0a (64-bit)
I logged in as a superuser. For normal user, please run sudo or su command to complete the task.
STEP:
- Before we begin, please check the partition of your hard drive. Open terminal and run fdisk -l.

- Now, plug in formatted (in fat32) usb drive and re-run fdisk -l to identity your usb drive name in partition table. Mine detected as sdb (Disk /dev/sda).

- Now, goto the location where you have placed your iso file. I chose Debian 8.1 (64-bit) Disc 1 to create bootable iso.


- Type dd command to create bootable usb. syntax: dd if=filename.iso of=/dev/sdx bb=y, where filename is the image of the file (in iso format), x represents external drive and y represent block size of the external drive (in kb as K or in mb as M). Please check screen-shot.

- Once program begin, you will find blinking cursor on the next line. Be patient for a while until it finishes creating bootable usb. Once finished, you will get the status of the operation.

- If operation is successful, run sync and then eject /dev/sdx. Plug in your usb drive. If operation is successful, you will see bootable usb icon on your desktop.

Available link for download
Tuesday, January 10, 2017
FHS File system Hierarchy Standard in Kali Linux
FHS File system Hierarchy Standard in Kali Linux
Filesystem Hierarchy Standard (FHS) defines the directory structure and directory contents in Linux operating systems. Based on Debian-package compliance, Kali Linux follows FHS. This means it allows all Linux users to easily locate binaries, support files, libraries, etc. Kali Linux has more than 300 penetration testing tools and you will be able to call any tool from anywhere on the system as every application is included in the system path. Unlike Backtrack, you do not have to navigate, just type the command name of the tool in root terminal and you are set to go.

Available link for download
Friday, December 16, 2016
PwnSTAR for Kali Linux
PwnSTAR for Kali Linux
PwnSTAR (Pwn SofT Ap scRipt) is a bash script to launch a Fake AP, configurable with a wide variety of wireless attack options now runs on Kali Linux. Here are the features of PwnSTAR.
Please click on PwnSTAR for Kali Linux.
- takes care of configuration of interfaces, macspoofing, airbase-ng and isc-dhcp-server
- steals WPA handshakes
- phishes email credentials
- serves webpages: supplied (eg hotspot, below) or provide your own
- sniffing with ferret and sslstrip
- adds a captive portal to the frontend of the fake AP
- assorted exploits
- de-auth with MDK3, aireplay-ng or airdrop-ng
Please click on PwnSTAR for Kali Linux.
Available link for download
Wednesday, December 14, 2016
Installing Kali Linux A step by step instruction
Installing Kali Linux A step by step instruction
Kali Linux, ver.: 1.0.3
Prerequisites:
Prerequisites:
- Minimum 8 GB of HDD space to install Kali Linux
- For i386 or amd64 architecture, a minimum of 512 MB RAM (1024 MB RAM recommended)
- An ISO or VMWare image can be downloaded from Kali Linux site
Here, I am going to guide you step by step to install Kali Linux (ver. 1.0.2) in a virtual machine. Procedure of installation is very much similar to Backtrack.
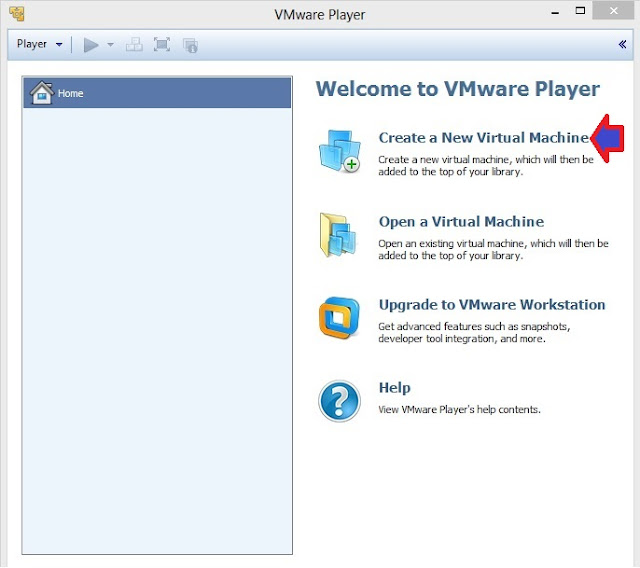
Click on the above link to download Kali Linux. When you goto this link it will ask you to register, however registration is not mandatory to download Kali Linux. Either, you can register by giving your name or email address to receive information updates or simply you can skip this step and click on "No thanks, just want to download!". Depending on the type, you can customize your download in ISO or VMWare format. Click on "Download Kali". Once Kali Linux is downloaded you are ready to install it in a virtual machine. I am using VMWare Player version: 5.0.2 build-1031769 here.
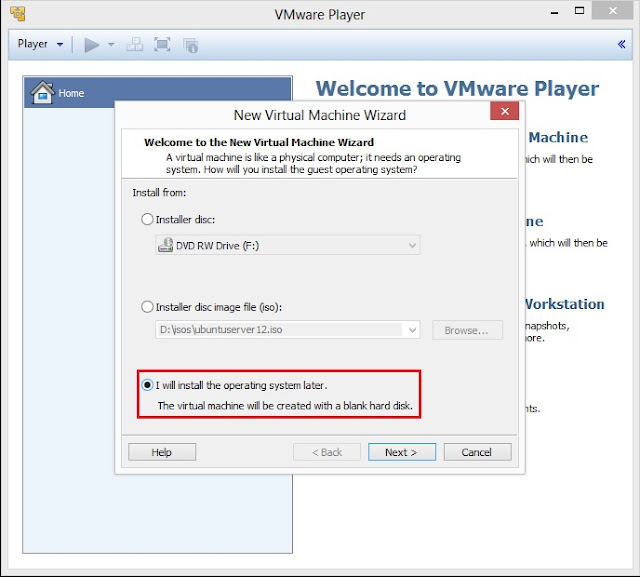
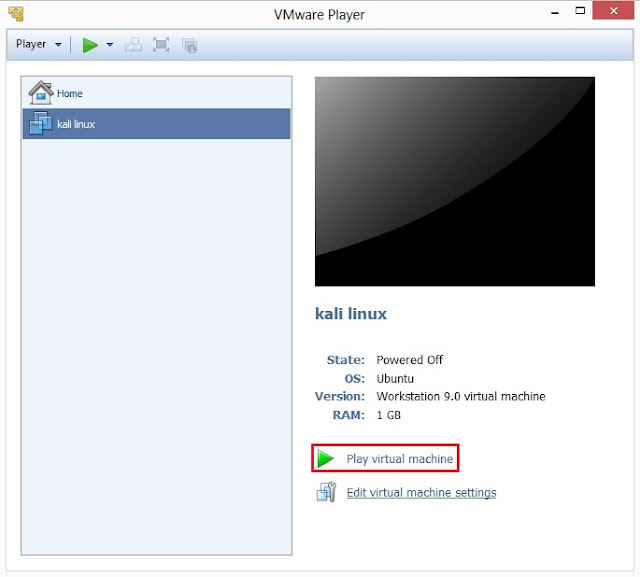
1. Open VMWare Player and click on Click a New Virtual Machine. It will open New Virtual Machine Wizard.
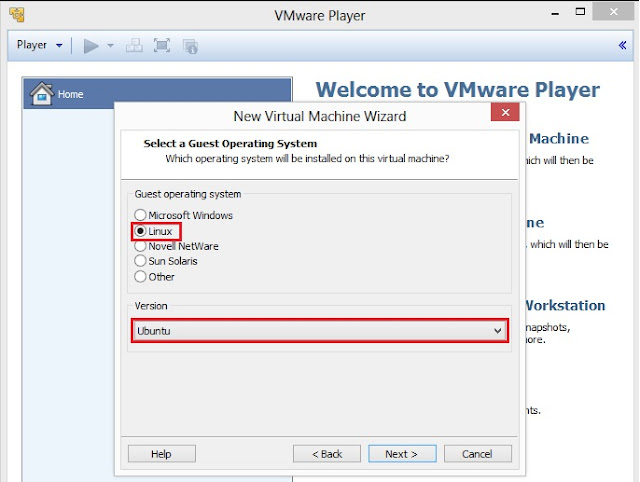
3. Select Guest operating system as Linux (kernel of Kali Linux is based on Linux) and then select Version as Ubuntu. Click on Next to goto next screen
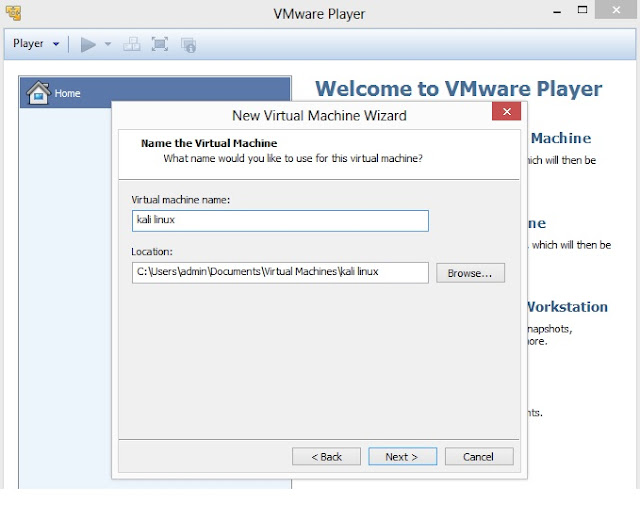
4. Type Virtual machine name and specify the Location where you want install Kali Linux, however you can leave the default Virtual machine name and Location. Click on Next to proceed to the next screen
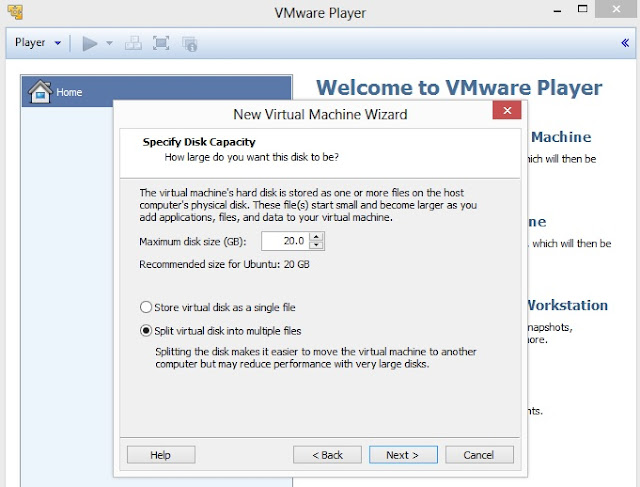
5. Specify Disk Capacity. Default is 20 GB. Select Split virtual disk into multiple files where file transfer is a major issue. Click on Next
6. On this screen, either you can click on Customize Hardware to customize settings and then to goto step no. 8 or click on Finish to complete the process of creating virtual machine
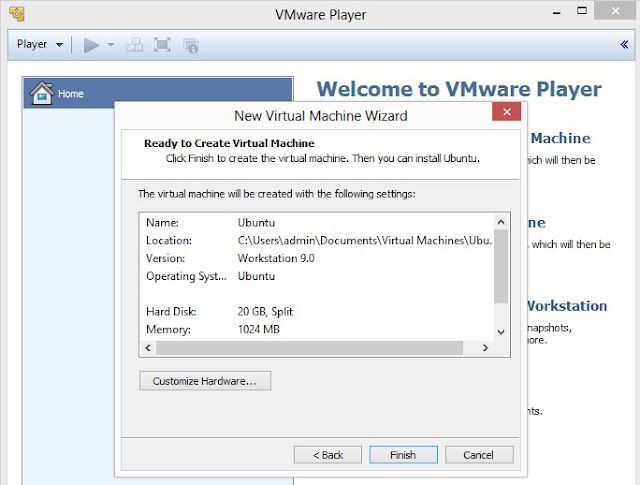
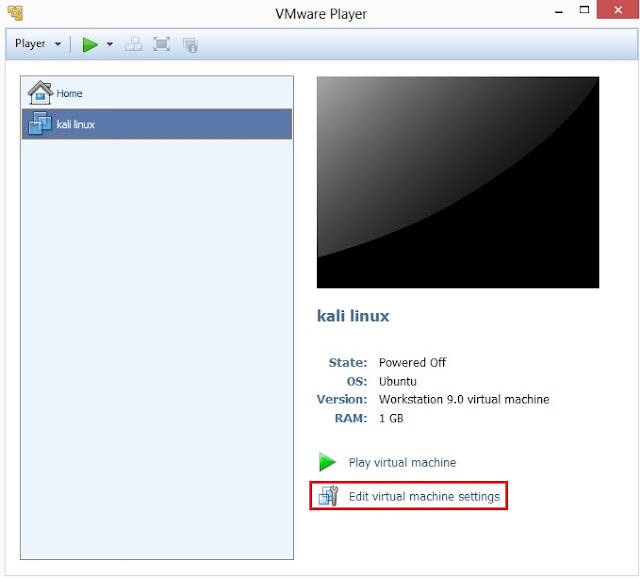
7. Click on Edit virtual machine settings
8. This is the screen where you can customize or edit your Hardware Settings. As mentioned above, the minimum system requirement is uni-processor of i386 or amd64 architecture processor, so click on
(a) Memory, to select minimum 1024 MB of RAM;
(b) Processors, as 1 or 2 (depending upon the processing speed) and Preferred mode as Automatic;
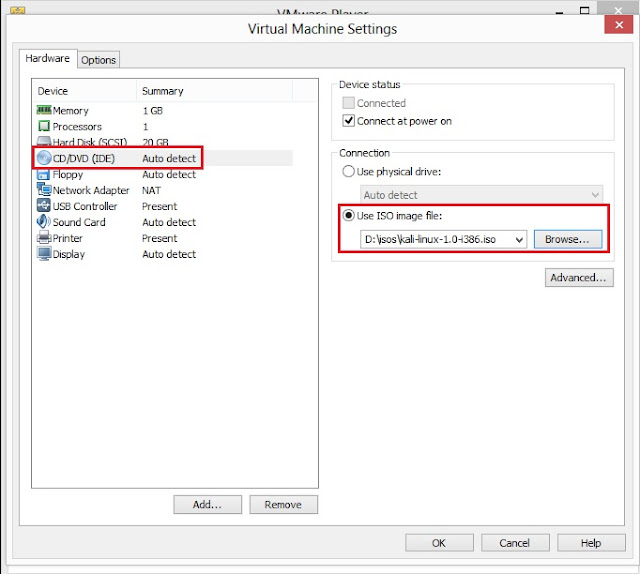
(c) Click on CD/DVD IDE. Now, on right hand panel you will Connection. It has two options:
Use physical drive- select this option if you have Kali Linux is in your CD or DVD drive; or
Use ISO image file- select this option if you have downloaded Kali Linux on your hard drive. Click on Browse to locate the ISO file
(d) Floppy drive is optional, as now a days most of the computers do not floppy drive
(e) Select NAT if you have network adapter for Internet
Other Hardware settings can be modified once installation process is completed. Now click on OK.
9. Select kali linux on left side panel screen and then click on Play virtual machine
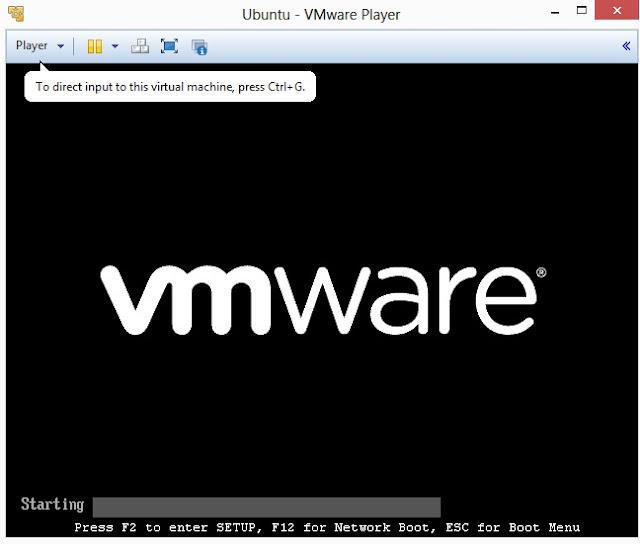
10 VMWare setup will startup
11. You will be greeted with Kali Linux boot screen. Choose either Graphical or Text-Mode install and press Enter to boot
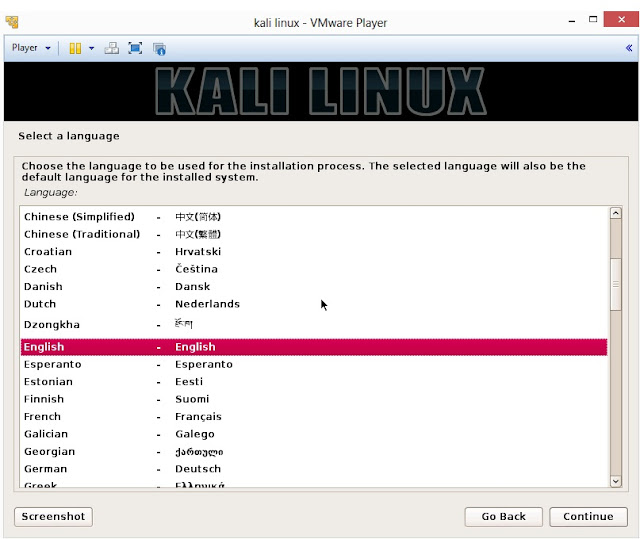
12. Select your preferred language and click on Continue
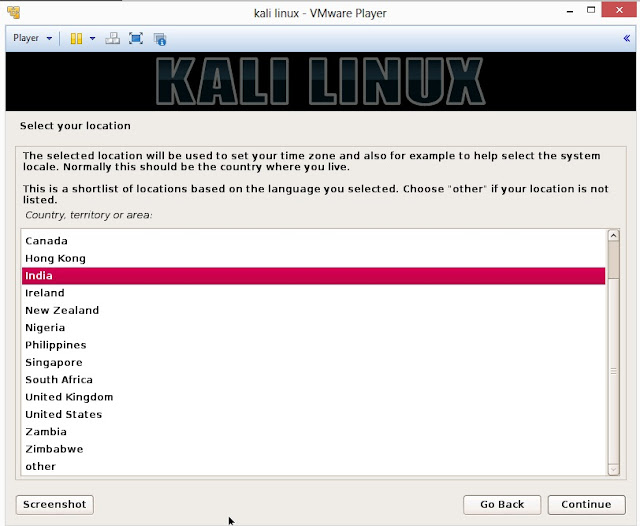
13. Select your location and click on Continue
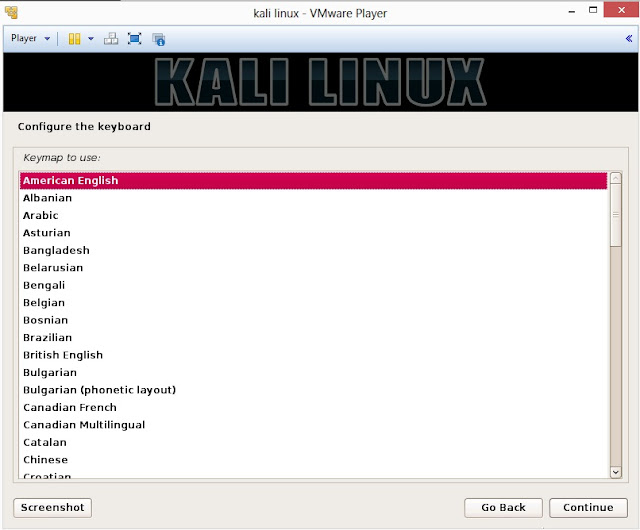
14. Select option to configure your keyboard and click on Continue
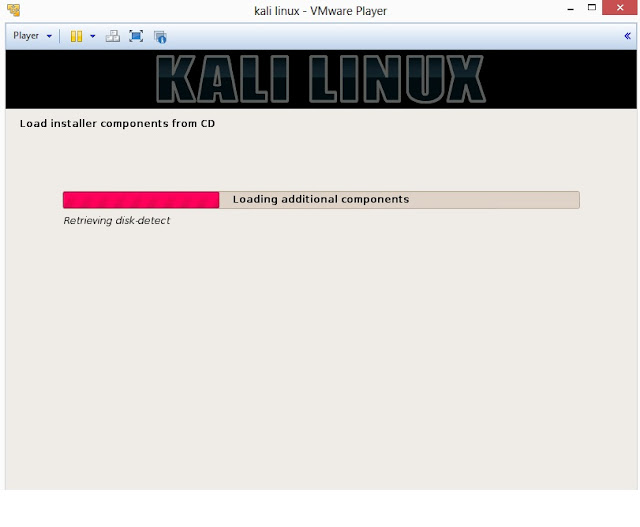
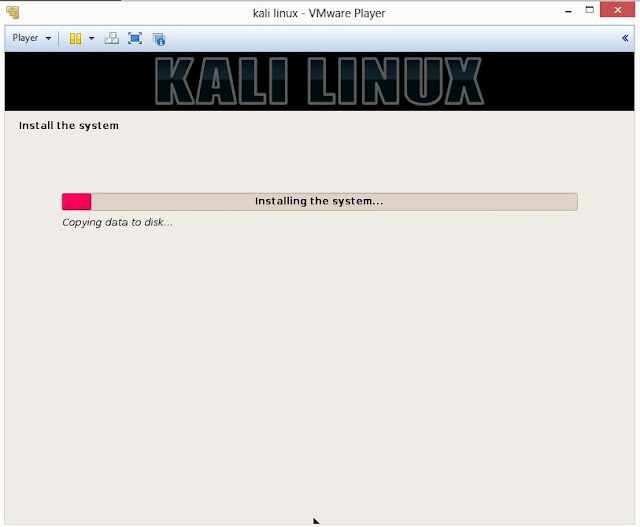
15. Once disc is detected by operating system, it will copy the image to your hard disk and probe your network interfaces
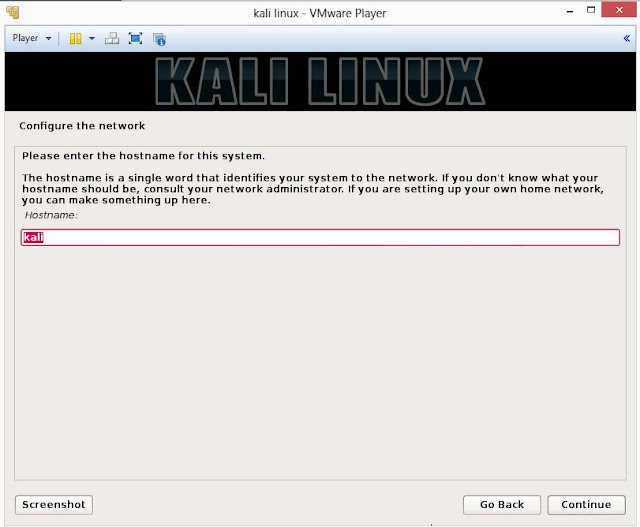
16. Enter hostname to configure your network and click on Continue
17. If you have a domain name, then enter here in the box. Make sure that you have a correct domain name. You can enter the domain name later and leave this box blank. Click on Continue

18. Enter robust password for your root account

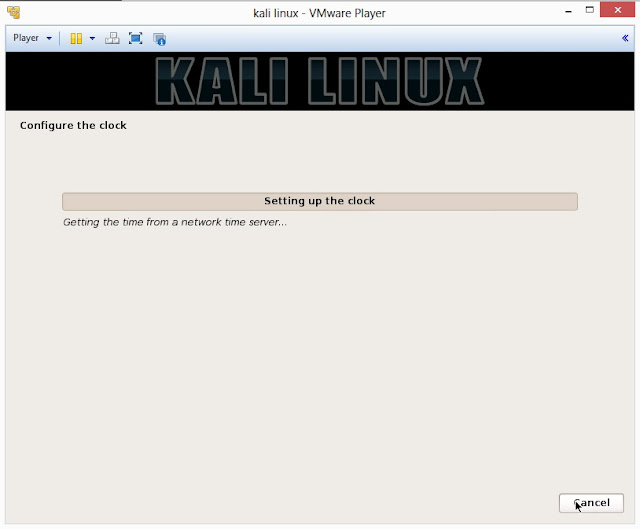
19. It will auto-detect time from network time server
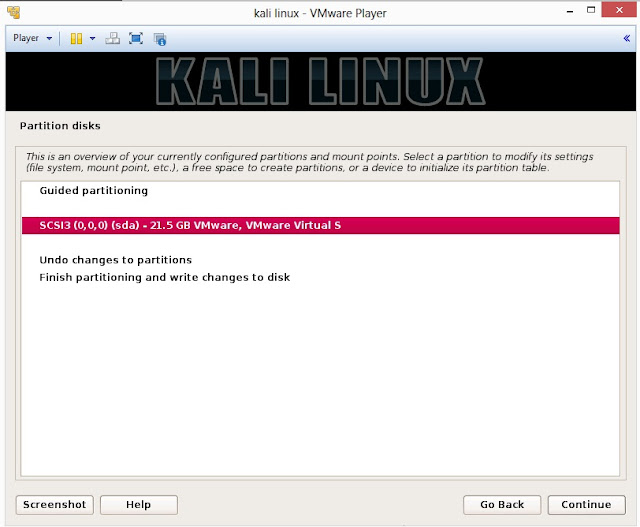
20. Installer will probe hard disk and offer you four choices of partitioning of disk. Beginner can select Guided- use entire disk however experienced user can setup partition as Manual
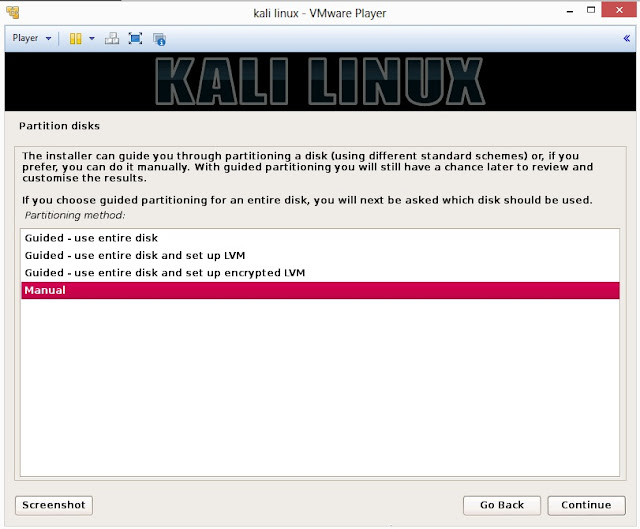
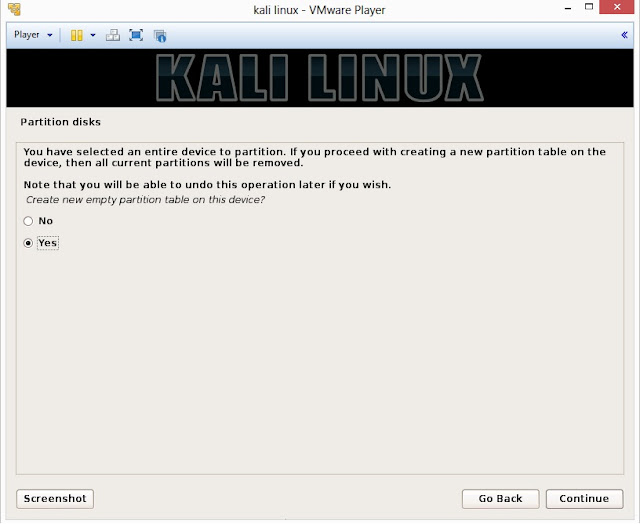
21. Below are the screenshots of manual partition. I have created three partitions
a. /boot (a partition from where your operating system will boot)
b. / (root partition for super user or admin)
c. swap (a portion where buffering is done)
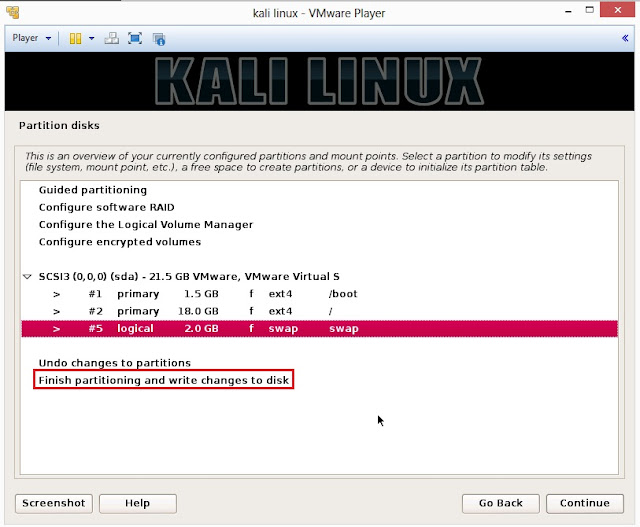
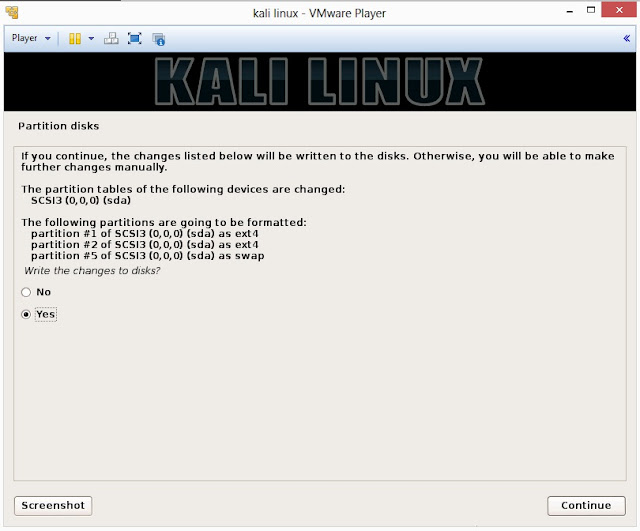
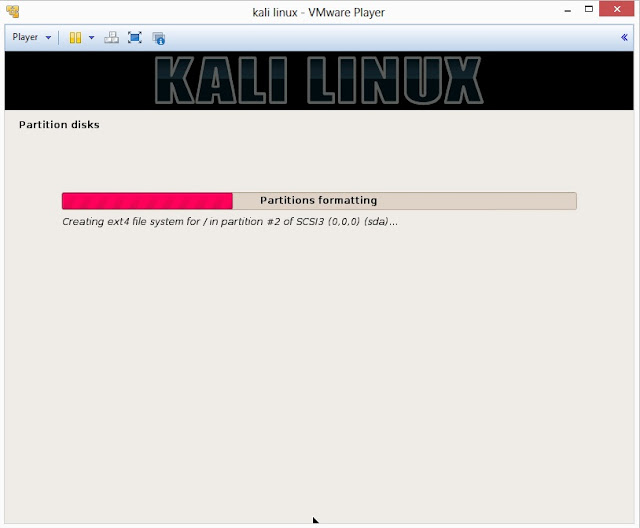
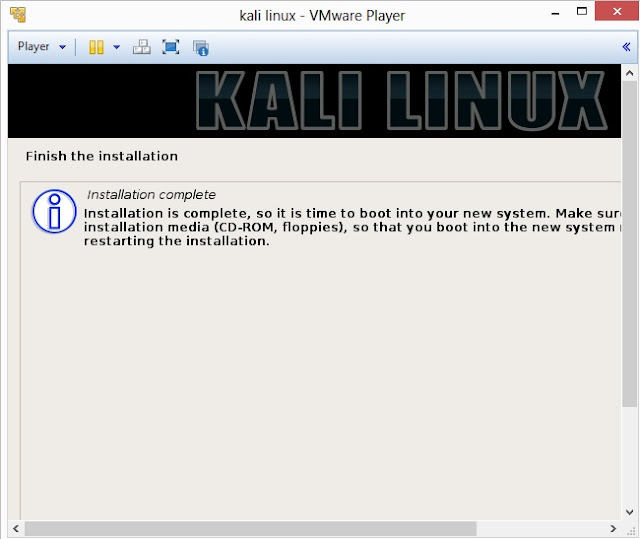
22. This is the screen where you’ll have last chance to review your disk configuration before the installer makes irreversible changes. After you click Continue, the installer will go to work and you’ll have an almost finished installation.
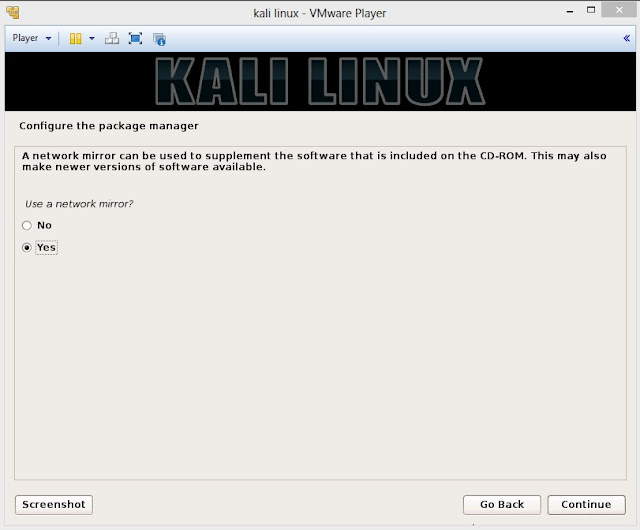
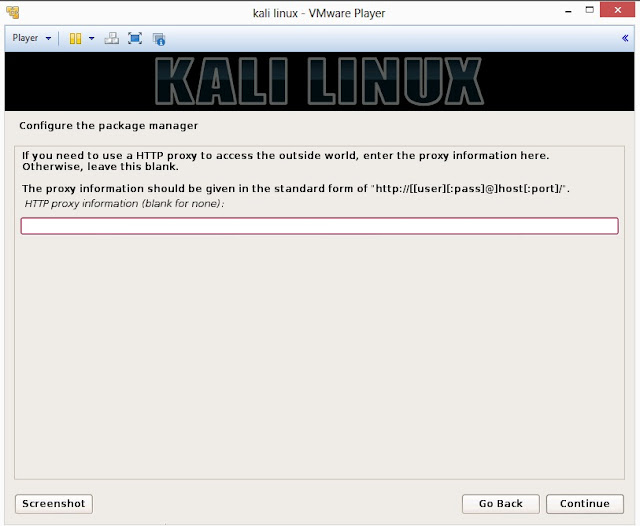
23. Configure network mirror to give additional software that is included on the CD-ROM
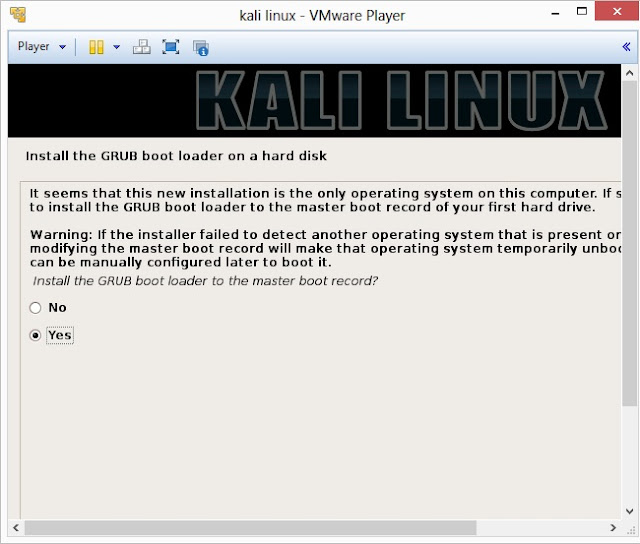
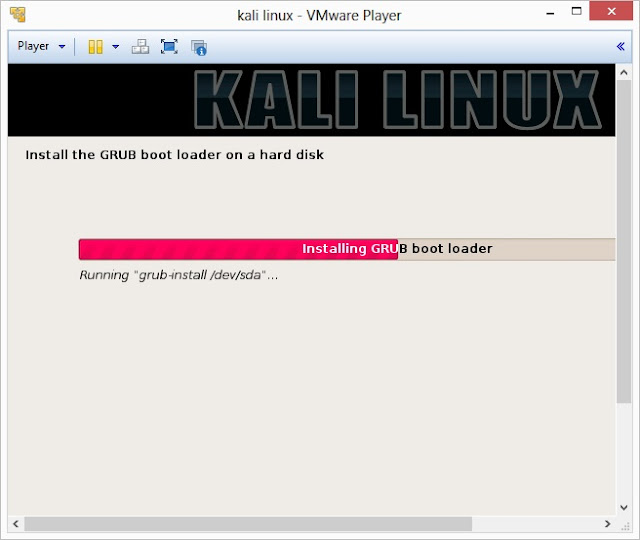
24. Install GRUB boot loader
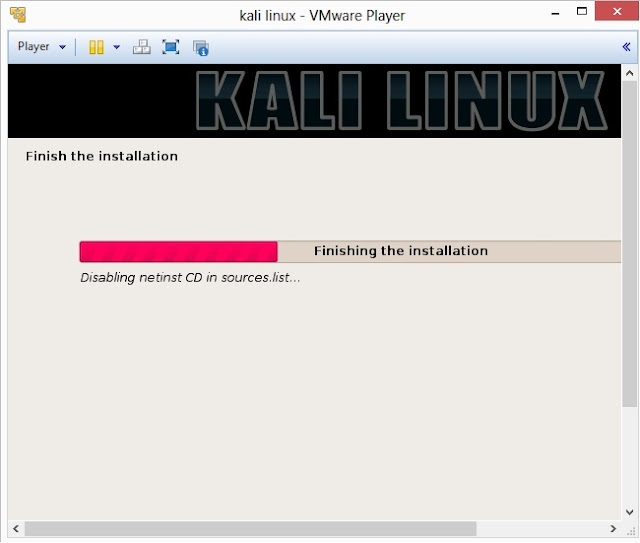
25. Finally, click on Finish to reboot Kali Linux installation
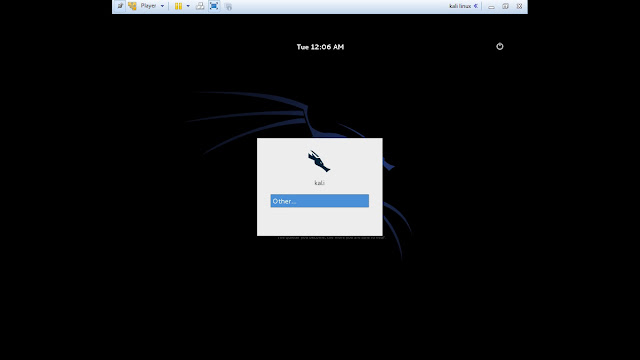
26. Login screen of Kali Linux
Available link for download
Subscribe to:
Posts (Atom)