Showing posts with label by. Show all posts
Showing posts with label by. Show all posts
Friday, February 17, 2017
Google Earth PRO Now FREE for PC MAC Download Full Version License Key Free By Google
Google Earth PRO Now FREE for PC MAC Download Full Version License Key Free By Google
Google Earth PRO Now FREE for PC & MAC: Download Full Version License Key Free By Google

Great news! Google Earth Pro, which formerly cost US$399 per year, is now available to download for FREE for both Windows & Mac. Google Earth is a geospatial software application that displays a virtual 3D interactive globe, which offers users access to world-wide imagery, and a large number of location-based layers. Google Earth Pro is the commercial-oriented upgrade to Google Earth and offers even more powerful tools.
Read more »Great news! Google Earth Pro, which formerly cost US$399 per year, is now available to download for FREE for both Windows & Mac. Google Earth is a geospatial software application that displays a virtual 3D interactive globe, which offers users access to world-wide imagery, and a large number of location-based layers. Google Earth Pro is the commercial-oriented upgrade to Google Earth and offers even more powerful tools.
Available link for download
Wednesday, January 11, 2017
Activator for Windows 7 Open 7 Activator by Nononsense HotCarl
Activator for Windows 7 Open 7 Activator by Nononsense HotCarl
Open 7 Activator by Nononsense & Hotcarl
Works on Windows 7 Basic/Home Premium/Pro/Ultimate build 7600 & 7601 (SP1) on both platforms x86(32 bit) and x64 (64 bit)
Instructions : 1. Extract the .7z file with 7-zip or equivalent.
2. Run the Open 7 activator.exe and try to run in as administrator mode.
3. Look for SLIC message, if its green then youre good to go and install license key/product key
4. If SLIC message shows an error, then select the loader mode to perform activation successfully. NOTE: If SLIC message shows Red icon error showing that No SLIC is Present, then youll need to resolve that first otherwise this activator might not work for you...
5. Restart your system...
6. Youre ready to receive the Genuine activation status and Windows Updates..
7. Enjoy..!!
Click here to Download - or
if the above link isnt working for you, then try this alternative direct link
Alternate Direct Download <--- Direct Link (No Ads or Surveys)
If above listed activator isnt working for you, then you can try this activator for Windows 7 all versions.
NOTE : SUPPORT THE AUTHORS AND PURCHASE THE SOFTWARE YOU LIKE SO AS TO SUPPORT THEM ...!!!
Tags: win 7 activator, win7 permanent activator, windows 7 activator, windows 7 permanent activator, all versions, working with SP1 update,
Available link for download
Thursday, December 29, 2016
Visit Websites Blocked Banned by Your ISP Country
Visit Websites Blocked Banned by Your ISP Country
Unblock or Visit Websites that are blocked by your ISP/banned in your Country with HotSpot Shield Elite v2.9
Dear Readers, Today im gonna discuss about something that is very irritating and annoying for most of online users that whenever they try to visit some sort of specific websites, they see messages like " This website has been blocked till further orders from Telecommunication Department" or You just see a blank page instead of information, which you were looking for... The situation becomes even worst when you desperately need some information or need to go specific site... for example, Most Popular sites like YouTube, Facebook and other social networking or entertainment sites are blocked by some Countries/Regions... So, now the question arises that How to unblock those sites ?
and the only Solution to this problem is either using proxy softwares or IP hiding softwares...
HotSpot Shield Elite VPN (Virtual Private Network) is a versatile internet security and privacy solution. In addition to protecting you from dangerous online threats, it also protects your privacy and enables you to access any blocked websites and content.
Advantages:
- Visit Websites that are blocked for you by your School/College/Work Place/ISP/Country... It works for all countries, no matter where in the world you live, this software will work and provide you with results.
- Surf anonymously - Means you cannot be traced by any website or hacker. The only information theyll be able to recover from you will be your fake IP that prevent you from being traced...
- Protects you from Snoops and Hacking while using Public Networks and Public WiFi hotspots.
Installation : Follow the instructions as provided in the .txt text file exactly as mentioned.. Tested by me.. WORKING 100%..
Click Here to Download <---- Link Updated
Password : " kalyani-786 " - without quotes
NOTE: Support the Authors of this Software, if You LIKE it... It helps them contribute even more..
Tags: unlock website ; unblock websites ; unblock adf.ly ; visit restricted websites ; how to access restricted/disabled/banned websites ; hotspot shield free download ; unlock youtube ; facebook ; mediafire ; rapidshare etc.
Available link for download
Wednesday, December 14, 2016
Installing Kali Linux A step by step instruction
Installing Kali Linux A step by step instruction
Kali Linux, ver.: 1.0.3
Prerequisites:
Prerequisites:
- Minimum 8 GB of HDD space to install Kali Linux
- For i386 or amd64 architecture, a minimum of 512 MB RAM (1024 MB RAM recommended)
- An ISO or VMWare image can be downloaded from Kali Linux site
Here, I am going to guide you step by step to install Kali Linux (ver. 1.0.2) in a virtual machine. Procedure of installation is very much similar to Backtrack.
Click on the above link to download Kali Linux. When you goto this link it will ask you to register, however registration is not mandatory to download Kali Linux. Either, you can register by giving your name or email address to receive information updates or simply you can skip this step and click on "No thanks, just want to download!". Depending on the type, you can customize your download in ISO or VMWare format. Click on "Download Kali". Once Kali Linux is downloaded you are ready to install it in a virtual machine. I am using VMWare Player version: 5.0.2 build-1031769 here.
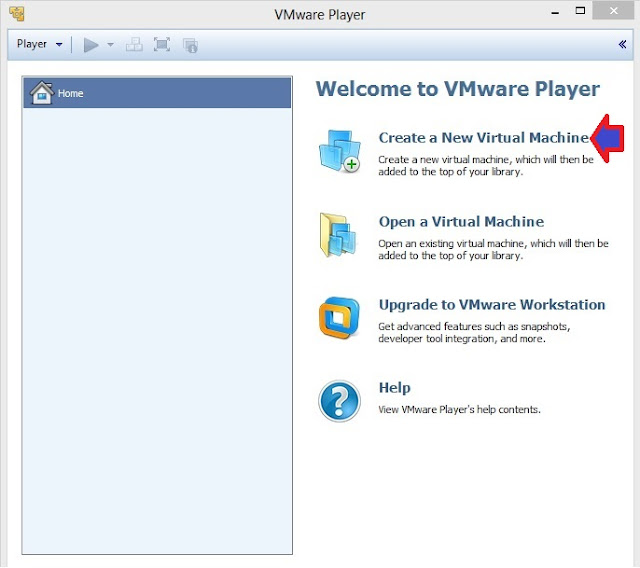
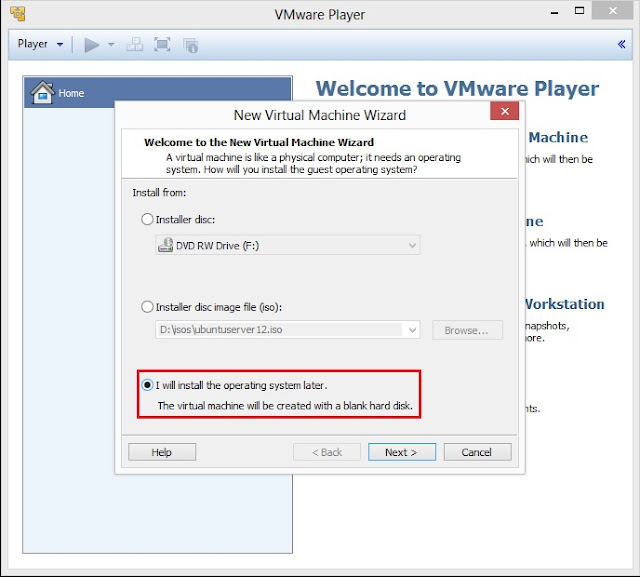
1. Open VMWare Player and click on Click a New Virtual Machine. It will open New Virtual Machine Wizard.
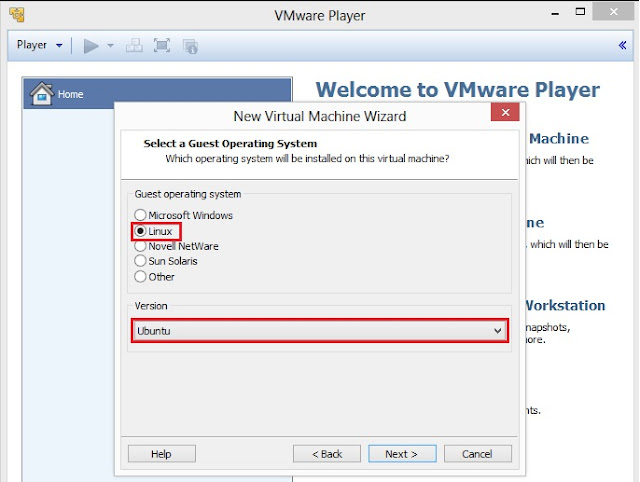
3. Select Guest operating system as Linux (kernel of Kali Linux is based on Linux) and then select Version as Ubuntu. Click on Next to goto next screen
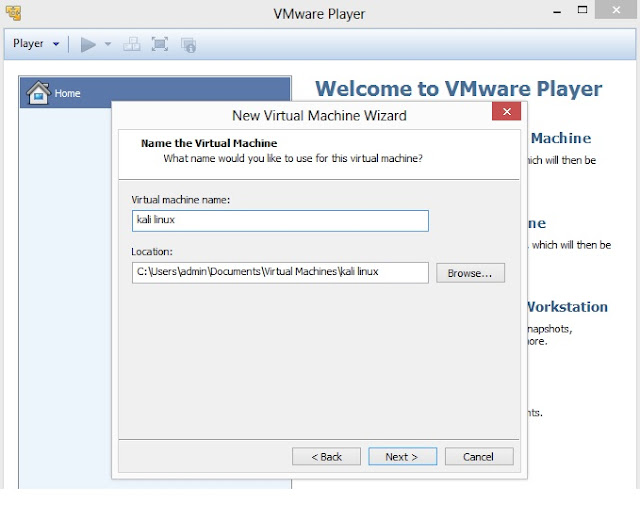
4. Type Virtual machine name and specify the Location where you want install Kali Linux, however you can leave the default Virtual machine name and Location. Click on Next to proceed to the next screen
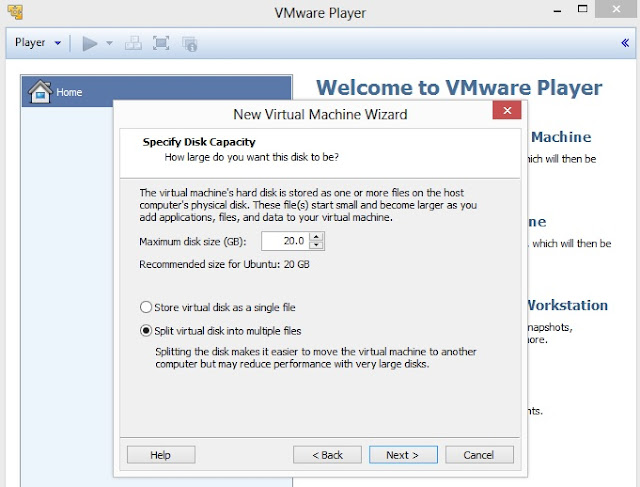
5. Specify Disk Capacity. Default is 20 GB. Select Split virtual disk into multiple files where file transfer is a major issue. Click on Next
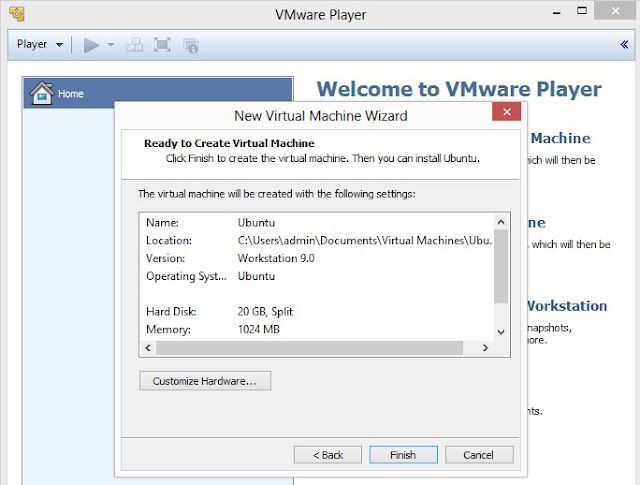
6. On this screen, either you can click on Customize Hardware to customize settings and then to goto step no. 8 or click on Finish to complete the process of creating virtual machine
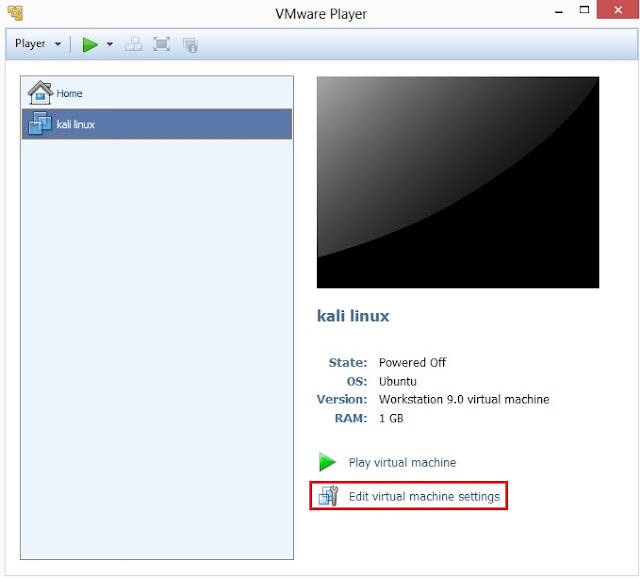
7. Click on Edit virtual machine settings
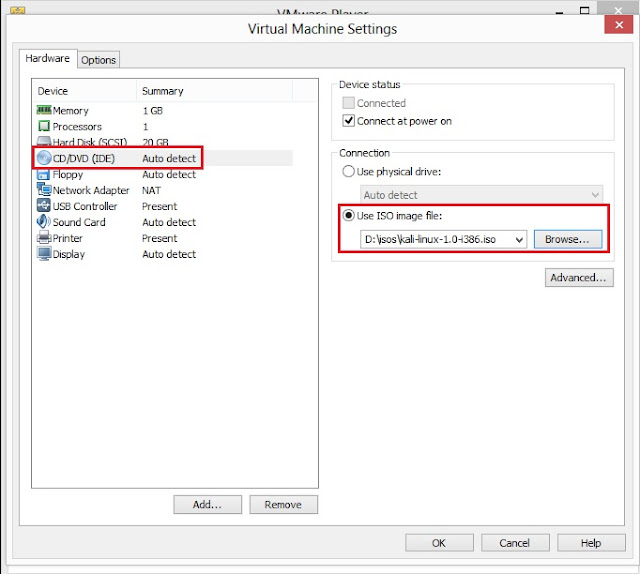
8. This is the screen where you can customize or edit your Hardware Settings. As mentioned above, the minimum system requirement is uni-processor of i386 or amd64 architecture processor, so click on
(a) Memory, to select minimum 1024 MB of RAM;
(b) Processors, as 1 or 2 (depending upon the processing speed) and Preferred mode as Automatic;
(c) Click on CD/DVD IDE. Now, on right hand panel you will Connection. It has two options:
Use physical drive- select this option if you have Kali Linux is in your CD or DVD drive; or
Use ISO image file- select this option if you have downloaded Kali Linux on your hard drive. Click on Browse to locate the ISO file
(d) Floppy drive is optional, as now a days most of the computers do not floppy drive
(e) Select NAT if you have network adapter for Internet
Other Hardware settings can be modified once installation process is completed. Now click on OK.
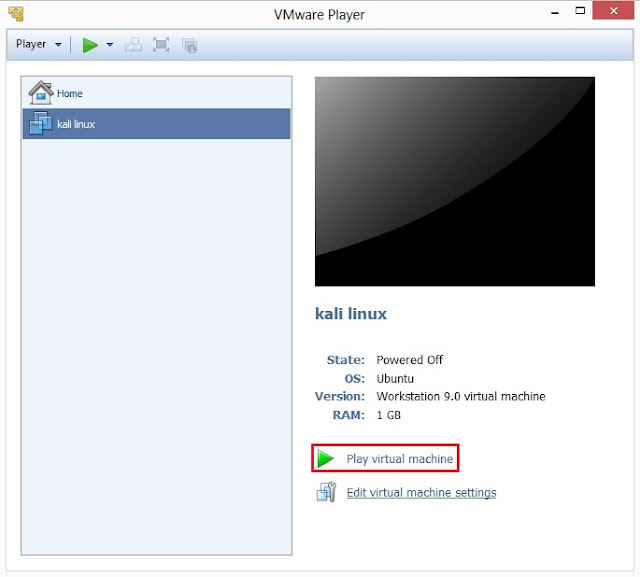
9. Select kali linux on left side panel screen and then click on Play virtual machine
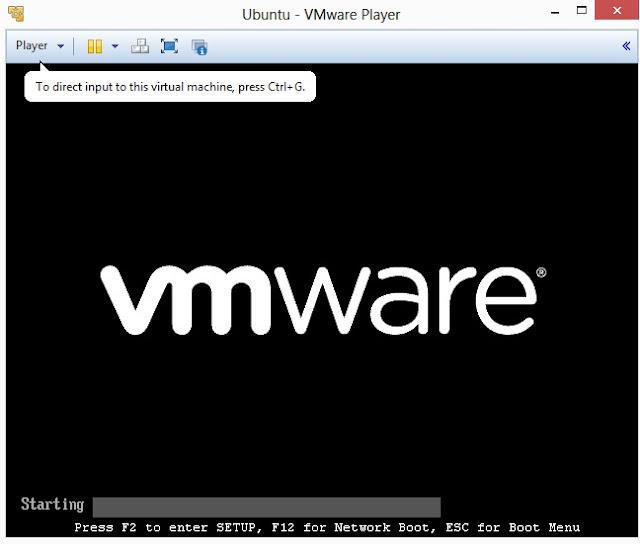
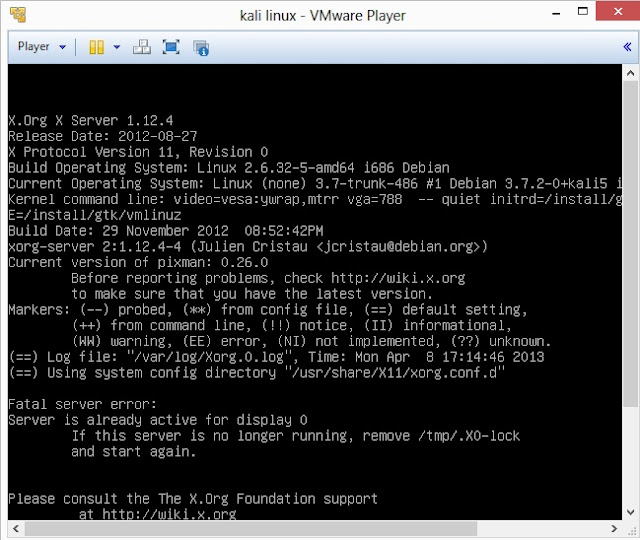
10 VMWare setup will startup
11. You will be greeted with Kali Linux boot screen. Choose either Graphical or Text-Mode install and press Enter to boot
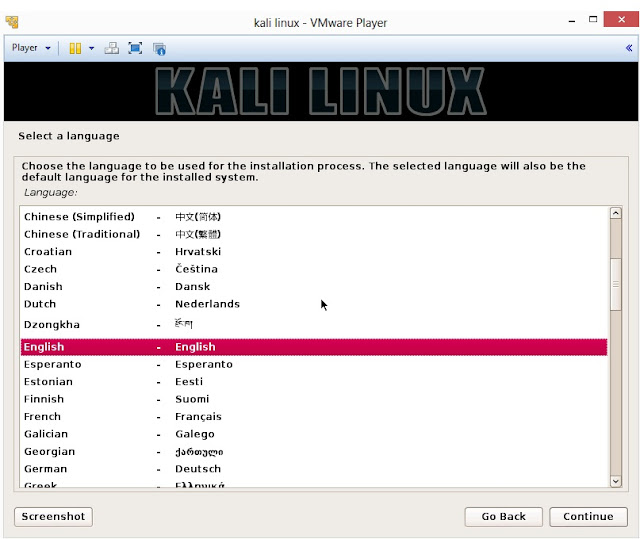
12. Select your preferred language and click on Continue
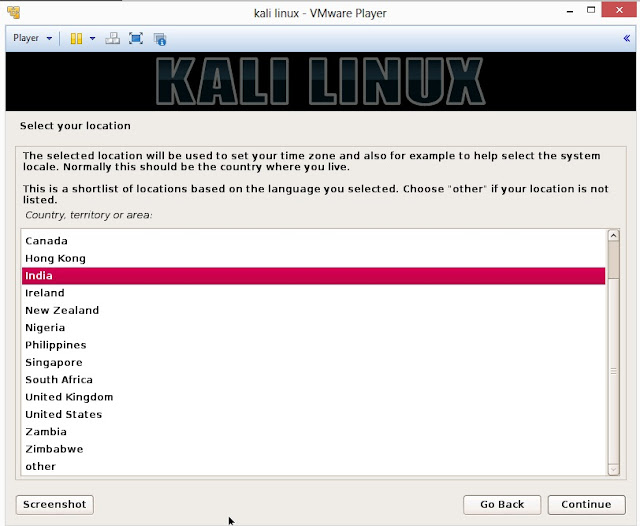
13. Select your location and click on Continue
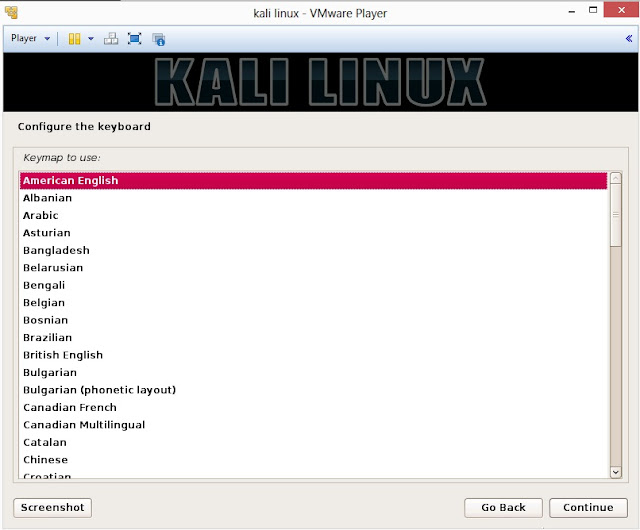
14. Select option to configure your keyboard and click on Continue
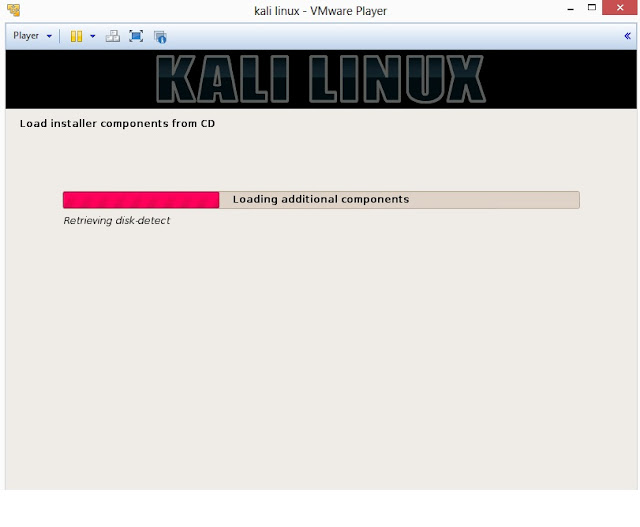
15. Once disc is detected by operating system, it will copy the image to your hard disk and probe your network interfaces
16. Enter hostname to configure your network and click on Continue
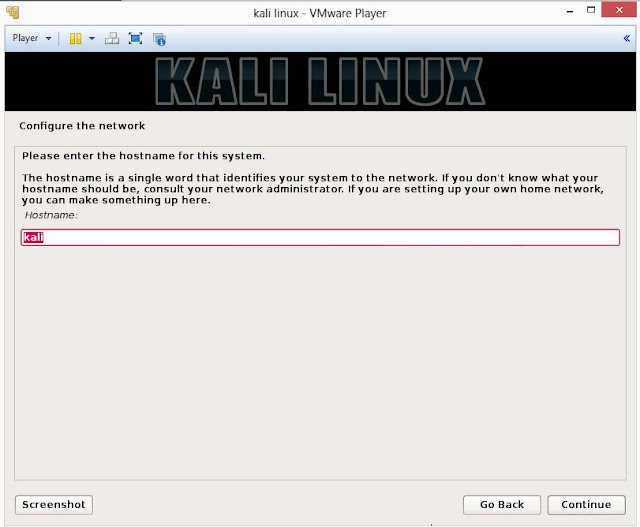
17. If you have a domain name, then enter here in the box. Make sure that you have a correct domain name. You can enter the domain name later and leave this box blank. Click on Continue

18. Enter robust password for your root account

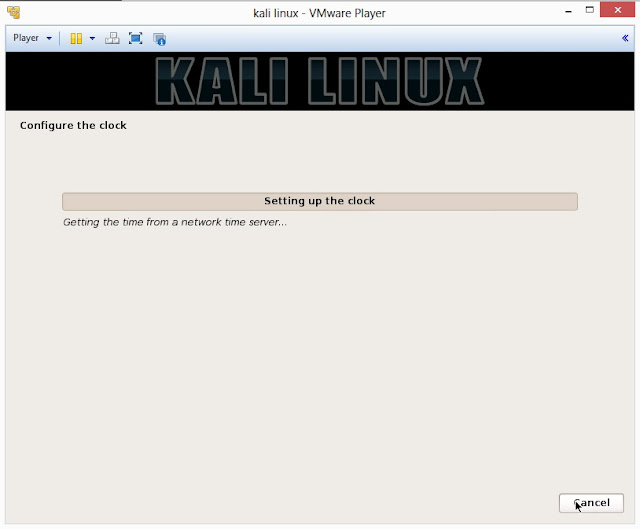
19. It will auto-detect time from network time server
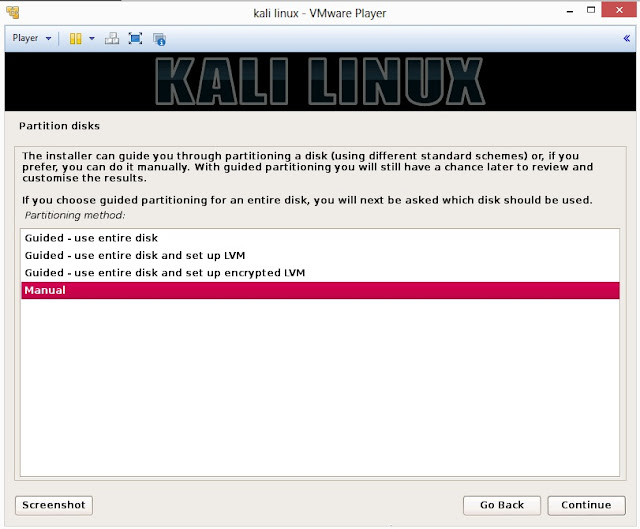
20. Installer will probe hard disk and offer you four choices of partitioning of disk. Beginner can select Guided- use entire disk however experienced user can setup partition as Manual
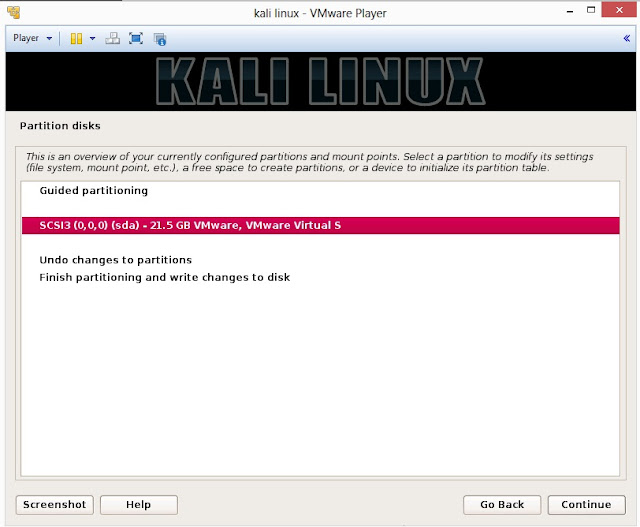
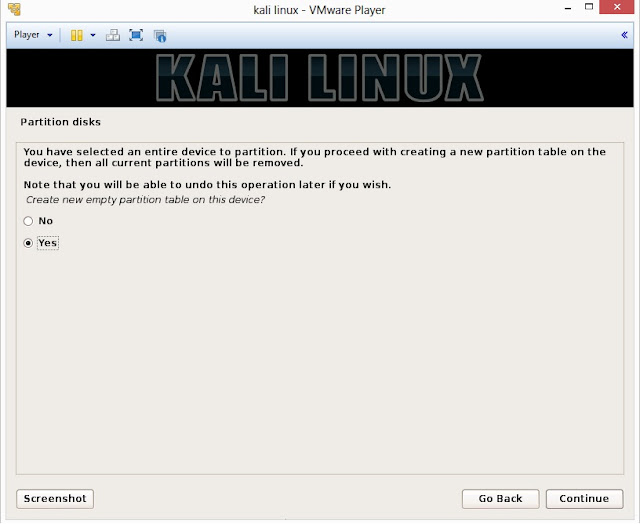
21. Below are the screenshots of manual partition. I have created three partitions
a. /boot (a partition from where your operating system will boot)
b. / (root partition for super user or admin)
c. swap (a portion where buffering is done)
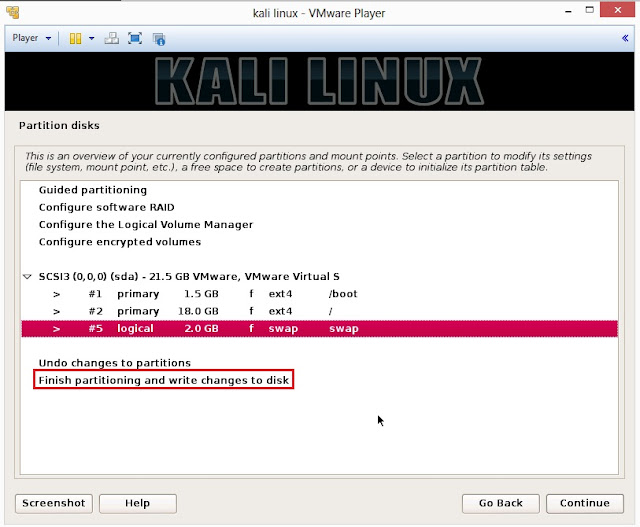
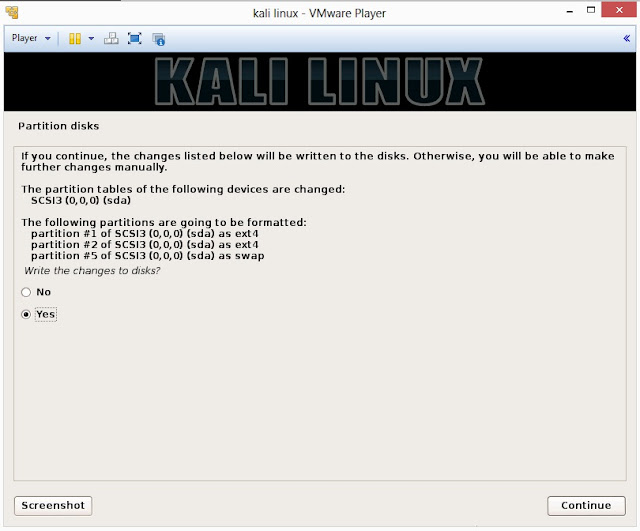
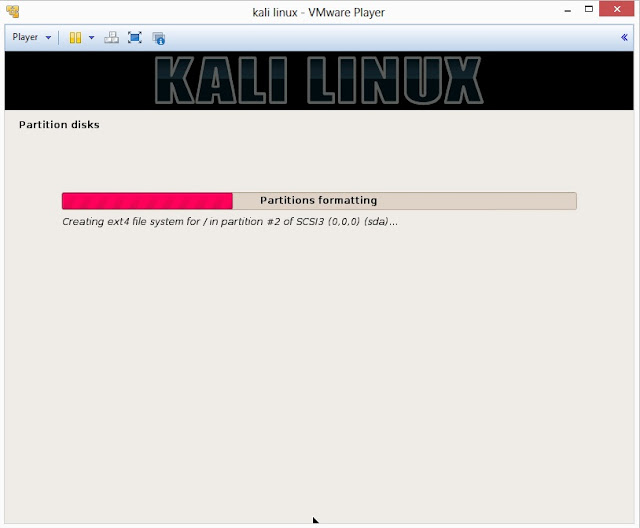
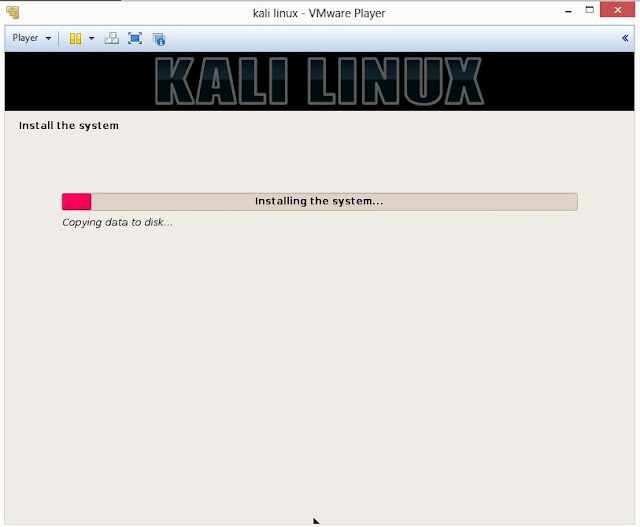
22. This is the screen where you’ll have last chance to review your disk configuration before the installer makes irreversible changes. After you click Continue, the installer will go to work and you’ll have an almost finished installation.
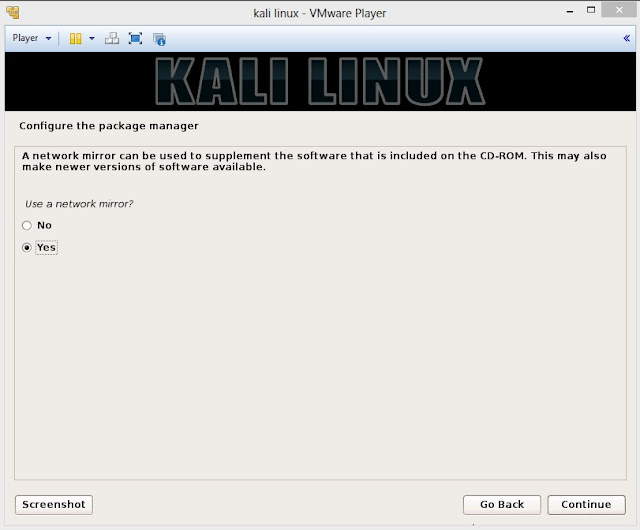
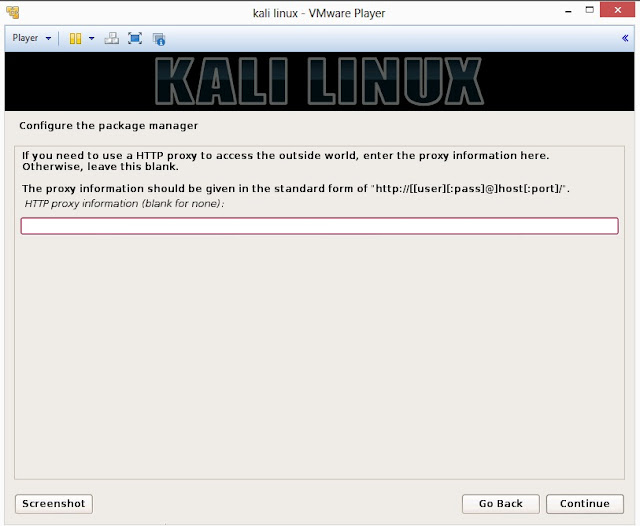
23. Configure network mirror to give additional software that is included on the CD-ROM
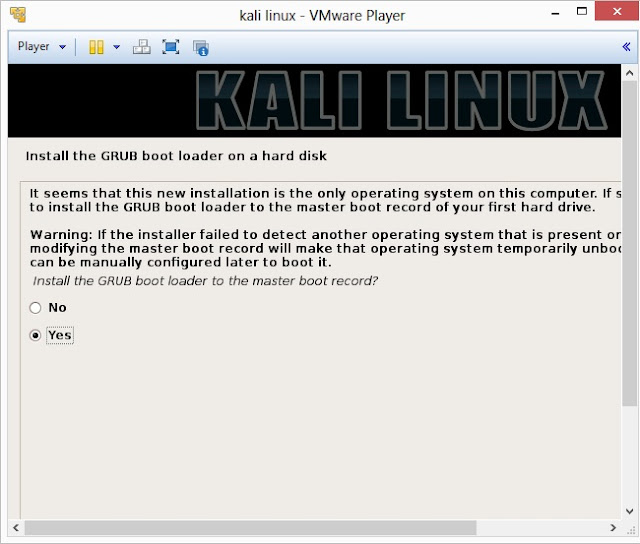
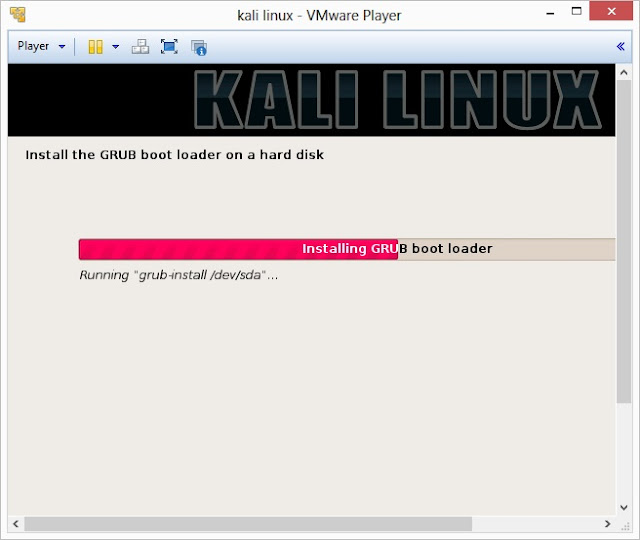
24. Install GRUB boot loader
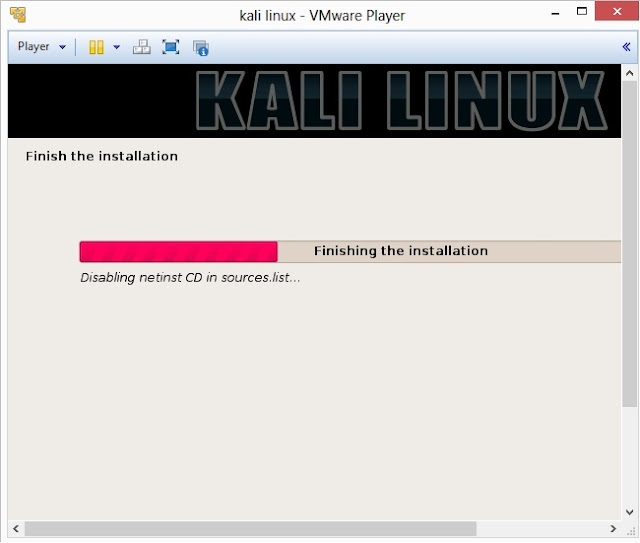
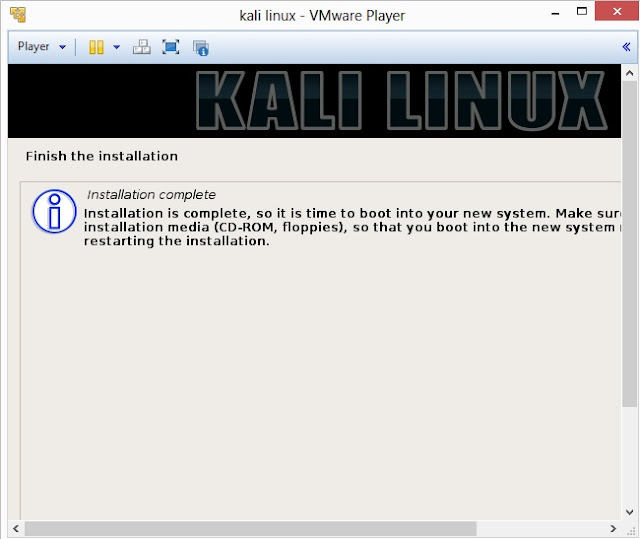
25. Finally, click on Finish to reboot Kali Linux installation
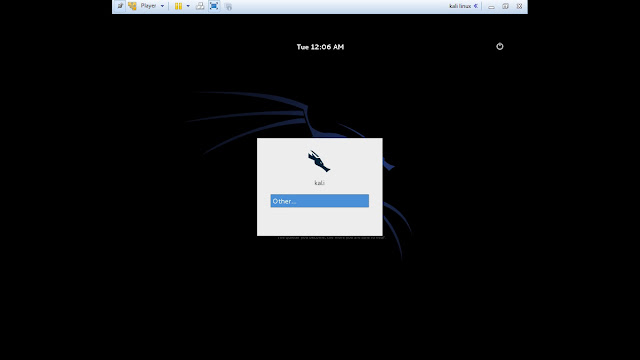
26. Login screen of Kali Linux
Available link for download
Thursday, November 24, 2016
How to Open Two Skype Accounts At the Same Time Steps step by step
How to Open Two Skype Accounts At the Same Time Steps step by step
Open Two Skype Accounts At Same Time...
See Following Steps :-
running two skype sessions simultaneously
heres a little command that will allow you to have two active skype acounts running at the same time on your PC:
(OS) Microsoft Windows 7 32bit:
1.click on start >run>enter the following commad (including the quotes):
2."c:program filesskypephoneskype.exe /secondary
3.Press the enter key
4.A new skype window will appear> login with your other account
(OS) Microsoft Windows 7 64bit:
1.click on start >run>enter the following commad (including the quotes):
2."c:program files(x86)skypephoneskype.exe /secondary
3.Press the enter key
4.A new skype window will appear> login with your other account
Available link for download
Wednesday, October 19, 2016
SEED AND PEER INCREASE BY SUBMIT TORRENT TORRENT REANOUNCE
SEED AND PEER INCREASE BY SUBMIT TORRENT TORRENT REANOUNCE
SEED AND PEER INCREASE BY SUBMIT TORRENT/TORRENT REANOUNCE

Increasing Torrent speed is fully depends on how much Seed And Peer your torrent file have.If your torrent file have very low seed and peer than its very hard to get a good downloading speed.So its good to have more Seed And Peer.
If your torrent have a zero seeds than your downloading will never get complete.
Than what to Do??
Torrentz is a best site for searching torrents.So whenever you search for torrent there dont forgot to check number of peers as well which is mentioned there.

But what if you have already a torrent file which dont have "Seed And Peer" and you cant find any alternative for that??
Solution is you can reannounce the torrent file.Just go to this link and reannounce the torrent.
You can follow instructions at this link.

In this way by following above link you can easily increase your Seed And Peer of your torrent file.With for number of Seed And Peer your torrent will give you more downloading speed.So its better to have as much as you can have Seed And Peer.
If your torrent have a zero seeds than your downloading will never get complete.
Than what to Do??
HOW CAN WE INCREASE SEED AND PEER FOR OUR DOWNLOADED TORRENT??
One solution may be download a torrent with good Seed And Peer.check the detail of torrent file and check for its live Seed And Peer.If torrent did not get a good Seed And Peer than search for another good torrent file.Torrentz is a best site for searching torrents.So whenever you search for torrent there dont forgot to check number of peers as well which is mentioned there.
But what if you have already a torrent file which dont have "Seed And Peer" and you cant find any alternative for that??
Solution is you can reannounce the torrent file.Just go to this link and reannounce the torrent.
You can follow instructions at this link.
In this way by following above link you can easily increase your Seed And Peer of your torrent file.With for number of Seed And Peer your torrent will give you more downloading speed.So its better to have as much as you can have Seed And Peer.
Note:-As always, if you would like to leave a sensible comment, then please do so in the comments section below.
Available link for download
Friday, October 14, 2016
Subscribe to:
Posts (Atom)