Showing posts with label laptops. Show all posts
Showing posts with label laptops. Show all posts
Monday, March 27, 2017
Bluetooth keyboard mouse disconnects frequently in Windows 7 laptops
Bluetooth keyboard mouse disconnects frequently in Windows 7 laptops
SOLUTION:
1] Start > All Programs > Accessories > right click Command Prompt > select Run as Administrator.
2] Type the command as follows and hit Enter key
- powercfg -devicequery wake_programmable

Note: If your bluetooth device name is not listed using above command, then go to control panel > click keyboard/mouse properties > select Hardware tab > note your bluetooth keyboard/mouse device name.
3] Now type the command as follows and hit Enter key.
- powercfg -deviceenablewake <device name>
- powercfg -deviceenablewake "Microsoft Bluetooth Notebook Mouse5000"

4] Exit and restart your laptop to take effect.
5] Now you can check that your device is enabled to wake up at any sleep state by using the command below.
- powercfg -devicequery wake_from_any
Available link for download
Thursday, January 5, 2017
MacBooks Weight Loose How Apples laptops have thinned out over time
MacBooks Weight Loose How Apples laptops have thinned out over time
Apples newest MacBook, announced sometime back, is the companys thinnest notebook ever. At just 13.1 millimeters (or 0.52 Inch) its the latest step in the evolution of personal computers, which, until recent years, were often clunky beasts.
Naturally, we wondered it : How does that super-slim profile compare in thickness to some of Apples other most popular devices? Not just notebooks, but phones, tablets — and, yes, watches.
Check out the graphic below for a scaled comparison of Apple products dating back to 1991. (Note: Devices are scaled to each other. Display on different screens may vary.)

Available link for download
Monday, December 26, 2016
Tweaks for TN Government Laptops
Tweaks for TN Government Laptops
To remove Linux BOSS, follow these steps:
- Boot the system and press F8
- Choose “Repair your computer”
- Windows Installer will load the necessary files and display the System Recovery option.
- After entering the username and password, a new Window with a list of recovery tools is displayed.
- Choose Command Prompt and enter: bootsect /nt60 SYS /mbr
- Restart the sytem.
- Go to Computer Management->Disk management. Format the drive containing Linux.

NOTE: Don’t format the drive before updating the bootsect.
Available link for download
Saturday, November 5, 2016
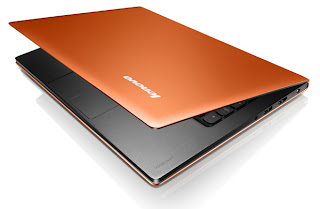
how to Lenovo Laptops Restore factory settings
how to Lenovo Laptops Restore factory settings
Lenovo Laptops - Restore factory settings
Before restoring factory settings on a Lenovo laptop,take a backup of all data and restart the system. There is no separate recovery disk shipped with Lenovo laptops; it is possible to restore the default configuration for Lenovo laptops through the BIOS settings menu. There is an option to restore the Lenovo Factory Image in the menu that will restore factory settings for the laptop. Once the system restoration starts, the drive will get formatted and the system software will be restored to factory condition. Once it is done, the laptop has to be restarted and other hardware device drivers or anti-virus software have to be installed manually.
Intro
Here are the main steps to restore your Lenovo laptop to its factory settings. Depending on the model you own, the the procedure may vary slightly.
Steps
Restore the computer to the default factory configuration
Note:
When you restore the computer to the default factory configuration, all data on the C drive is deleted. Before performing this procedure, back up any personal files. If you do not back up these files, the data will be lost.
· 1. Restart the computer
· To do this, click Start, click the arrow next to the Lock button, and then click Restart.
· 2. As the computer restarts, press the F8 key until the Advanced Boot Options menu appears on the screen.
· Note: You must press F8 before the Windows logo appears on the screen. If you press F8 after the Windows logo appears, the Advanced Boot Options menu does not appear on the screen. If you do not see the Advanced Boot Options menu, restart the computer, and then repeat this step until you see the menu on the screen.
· 3. Press the Down arrow to select Repair Your Computer on the Advanced Boot Options menu, and then press Enter.
4. Specify the language settings that you want, and then click Next.
5. Log in as a user who has administrative privileges and click OK.
6. Click Lenovo Factory Image Restore.
7. In the Lenovo Factory Image Restore window, click Next.
8. Check the box saying Yes, reformat the hard drive and restore system software to factory conditions.
9. Click Next. The computer is restored to the default factory configuration.
Read More...
Any Kind of Lenovo Problems Call Us
+1-855-517-2433 (Toll Free)
Available link for download
Subscribe to:
Posts (Atom)