Showing posts with label read. Show all posts
Showing posts with label read. Show all posts
Tuesday, December 20, 2016
A disk read error occurred Fix for Windows XP Vista 7 8
A disk read error occurred Fix for Windows XP Vista 7 8
Why A disk read error occurred appears
The “A disk read error occurred error” appears on a black screen without an identifiable error code:
A disk read error occurred
Press Ctrl+Alt+Del to restart
Pressing the Ctrl, Alt and Del keys will only restart the computer and boot into the same error screen:

In most cases the error can appear for any of the following reasons:
- faulty hard drive
- IDE cables failing
- bad RAM memory
- issues with your computer’s BIOS version
Fix with Easy Recovery Essentials
Easy Recovery Essentials can fix many errors such as this automatically using its built-in Automated Repair option. EasyRE is currently available for Windows XP, Vista, 7 and 8 and can be downloaded and created on any PC.
- Download Easy Recovery Essentials. Make sure to note your Windows version (XP, Vista, 7 or 8) before you download EasyRE. This guide can help you identify what version of Windows you have installed.
- Burn the image. Follow these instructions on how to burn the bootable ISO image very carefully, as making a bootable CD can be tricky! Alternatively, these instructions explain how to create a bootable EasyRE recovery USB stick/drive.
- Boot up your PC from the Easy Recovery Essentials CD or USB you created.
- Once EasyRE is running, choose the “Automated Repair” option and click Continue.
 Choose “Automated Repair” in Easy Recovery Essentials
 - After EasyRE scans your computer’s drives, identify and select the drive letter for your Windows installation from the list, and then click on the Automated Repair button to begin.
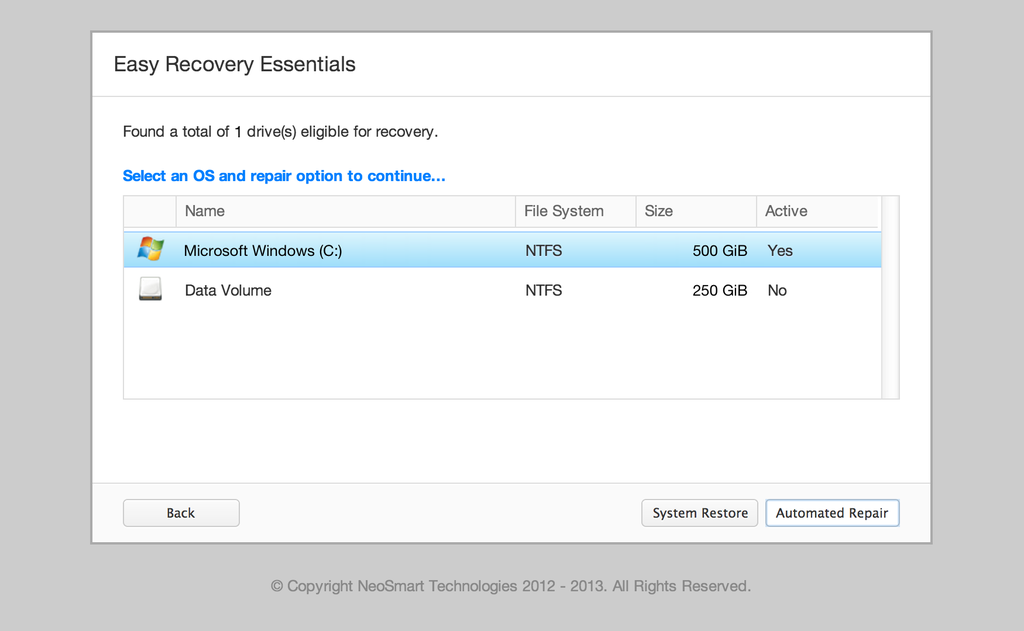 Choose the drive associated with the Windows installation you’re trying to repair.
 - Easy Recovery Essentials will start analyzing the selected drive for problems. EasyRE will test for and attempt to automatically correct errors with the disk, partition, bootsector, filesystem, bootloader, and registry. No intervention is required, as EasyRE’s repair is fully automated:
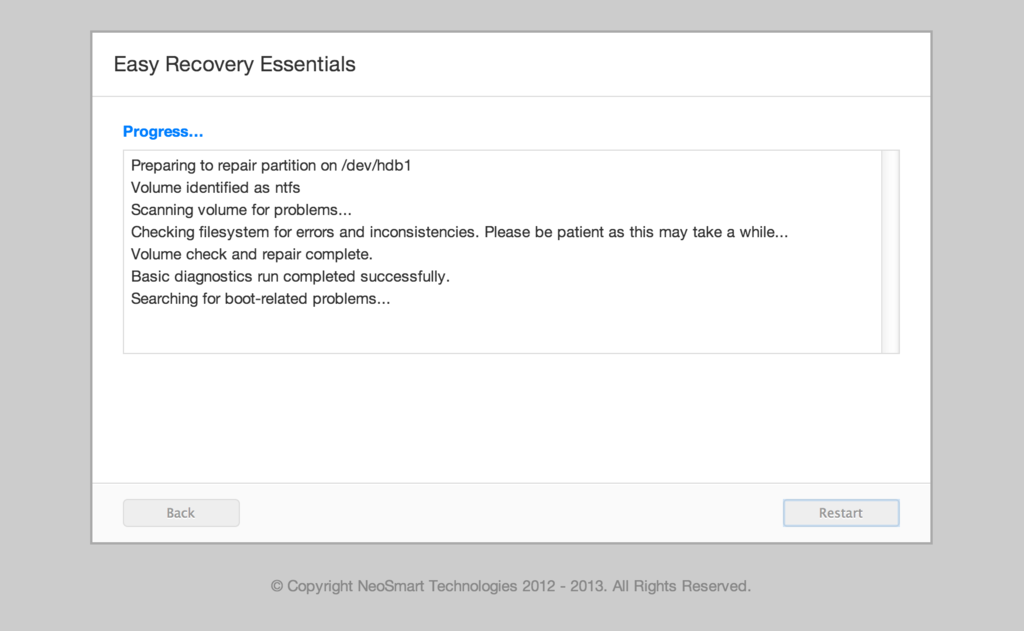 Easy Recovery Essentials searches for errors and makes corrections to the selected Windows installation.
 - Once the process is complete, EasyRE will report its findings. Click on the Restart button to reboot your PC and test the changes.
- The “A disk read error occurred” error should now be fixed as your PC begins to load:
 Windows, booting up successfully.
You can download Easy Recovery Essentials from here.
Other fixes for A disk read error occurred
You can try and fix the “A disk read error occurred” error by following any of these methods. These fixes can be applied to the followings Windows versions:
- Windows XP
- Windows Vista
- Windows 7
- Windows 8 and Windows 8.1
Windows Setup CD/DVD Required!
Some of the solutions below require the use of the Microsoft Windows setup CD or DVD. If your PC did not come with a Windows installation disc or if you no longer have your Windows setup media, you can use Easy Recovery Essentials for Windows instead. EasyRE will automatically find and fix many problems, and can also be used to solve this problem with the directions below.
Some of the solutions below require the use of the Microsoft Windows setup CD or DVD. If your PC did not come with a Windows installation disc or if you no longer have your Windows setup media, you can use Easy Recovery Essentials for Windows instead. EasyRE will automatically find and fix many problems, and can also be used to solve this problem with the directions below.
Fix #1: Check RAM memory
If you recently added new RAM memory to your computer, you can try to:
- Remove the new RAM modules you’ve recently added
- Leave only 1 single RAM module
- Restart the computer
You can also try to move the single RAM module on a different slot to troubleshoot if any of your RAM slots are damaged. To do that, simply follow these steps:
- Leave 1 RAM module on Slot #1
- Restart the computer
If “A disk read error occurred” still appears, move the RAM module on Slot #2 and start the computer again.
Fix #2: Check Hard Disk Cables
If the error is caused by damaged hard disk cables, try any of the following tips to fix the error:
- Try a different port for the SATA/IDE cables
- If you have more than 1 HDD, leave only the HDD with Windows installed and test multiple SATA/IDE ports and cables
The “A disk read error occurred” error can appear if:
- The SATA/IDE cables are damaged
- The SATA/IDE ports of your hard disks are damaged
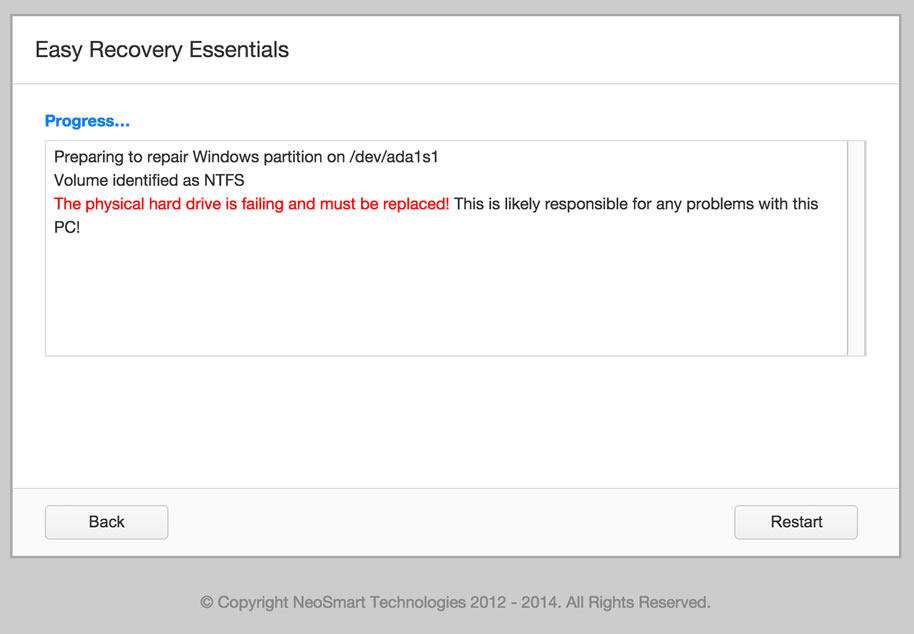
If the HDD cables and ports are not damaged, the issue can also be from the hard disk itself.
To test if your hard disk is failing or it’s already failed, use Easy Recovery Essentials’ Automated Repair. Automated Repair process will report any issues found with your hard disk or RAM memory:
- Download Easy Recovery Essentials
- Burn the ISO Image. Follow our instructions on how to burn a bootable ISO image. If you’d like to have a recovery USB instead, follow our instructions on how to make a recovery USB.
- Boot into Easy Recovery Essentials
- Select Automated Repair
- Click Continue and wait for the Automated Repair process to finish. Automated Repair process will report any issues found with your hard disk or RAM memory:
To download Easy Recovery Essentials, click here.
Fix #3: Reset or Upgrade BIOS
In some cases, “A disk read error occurred” can be fixed by either reverting your BIOS to its default settings or upgrading BIOS to the latest version available for your computer.
To revert your computer’s BIOS to its default settings or default configuration, follow these steps:
- Restart the computer
- Press the key to boot into BIOS. This is usually any of the following keys: F2, F8, F12, Esc or Del. The key you need to press will be listed at the first screen when you boot your computer:

- Once booted into BIOS, find a “Load Defaults” options. The option name to revert to default settings can be different, depending on your computer manufacturer and BIOS version:
- Load Fail-Safe Defaults
- Load BIOS Defaults
- Load Default Settings
- Load Setup Default
- Get Default Values
- Select to revert the settings and hit Enter to select the option
- Exit BIOS by saving the changes
If reverting to BIOS defaults doesn’t make “A disk read error occurred” disappear, you can also try to update the BIOS version to the latest available.
Fix #4: Run chkdsk
The chkdsk utility checks for hard drives integrity and can attempt to fix various file system errors.
To run chkdsk on a Windows XP system, follow these steps:
- Insert the Windows XP CD and boot from it
- Available link for download
Saturday, December 17, 2016
How to Read MCB Nameplate Rating
How to Read MCB Nameplate Rating
MCB (Miniature Circuit Breaker) is very common protection device (Such as fuse) used in domestic and industrial wiring and application and most of us have tried to buy MCB. It is very important device, which is to be procured with care.
But when we use to visit shops or take advice of our “expert” electrician then in most of time, without any technical consideration they advise for a particular brand. For us, especially who is not from electrical background, it is very tough to understand technical points of MCB.
We just see the MCB rating and buy it. It is really a wrong practice. Your electrician or shopkeeper may be suggesting you the right product but you also should know about it while purchasing. Deciding MCB is very simple. Most of the data is generally printed on a MCB. Only few local companies hide information and you can easily ignore them. We would like to tell you about printed information of MCB.

- Model Number.: All reputed manufacturer has a particular code of each device type. It will be very easy to communicate with seller or manufacturer, if you quote the model no., in case of any service complaint.
- MCB Current and Curve Rating: As shown in example it is mentioned D125.First letter is showing is characteristics curve. There are three characteristics curves (In common use) available- B C & D. B curve indicates that short circuit rating of device is in range of 3-5 times of standard rated current. C curve indicates it to be 5-10 times and D curve indicates it to be 10-20 times. Be very careful while selecting this. On a resistive load (say heater, normal lighting load) it will B Curve, for inductive load (Like pump, Motors etc.) it will be C curve and for highly inductive or capacitive load it will be D curve. The numeral part indicates rating of MCB in Ampere. In the given example it is 20A. MCB rating is very important and be very precise about it.
- Operating Voltage: It is in Volts and is the operational voltage for which current rating is said. In three phase it is usually 400V or 415 V. For single phase it is 230V or 240V. Choose as per your application only.
- MCB Breaking Capacity: Breaking capacity can be defined as the maximum level of fault current which can be safely cleared. It is written as in numerals like in in example it is 10000. It means it 10000A = 10kA. Choose breaking capacity as per your fault level possible. Since it is the parameter which may increase or decrease the cost, so it should be properly decided. Breaking capacity should be higher than the possible fault level. For domestic application where fault level cannot be calculated easily, it advisable that go for a standard breaking capacity of 10kA which is easily available. Please note that this rating is mentioned as per testing made on basis of IS 60898. If it is for IEC60947-2 then it need to be mentioned separately.
- Energy Class: MCB normally work on current limiting feature. It means that it does not allow fault to get it’s peak and trip before that. But since there is some time consumed in tripping, fault current will create some energy which will exist in system. This energy is termed as let through energy. For efficient MCB operation it should be limited. On basis of amount of energy it is classified in class 1, class 2 and class 3. Here Class 3 is best which allows maximum 1.5L joule/second. This is being tested as per IS 60898.
- Status Indicator: It shows the ON-Off Indication while in operation. Never buy an MCB which don’t have clear status indicator because serious damage may be occurred with ON-OFF confusion of the device.
- Operation Symbol: This is always printed by any good manufacturer. This shows operation mechanism of MCB.
- Additional Relevant Information : Information like Impulse voltage, ISI marking etc are usually printed on side of MCB. However there are many parameters on which quality of MCB should be judged but aim of this blog is to make you aware of printed information on MCB.
- Catalog No: Most of the MCB manufactures put the catalog number of the MCB products. This code provide the overall information on the manufacture website such as MCB specification and Datasheet ect.
Below is the typical MCB nameplate rating data which shows the most important information printed on it.
These are generally:
- Product Modal No
- Max Current Rating
(6, 10, 16, 20, 25, 32, 40, 60, 63 etc) - Operation Symbol
- Breaking Capacity Type
- Breaking Capacity (Max Short Circuit Current)
- Operating Voltage(230V, 400V, 440V)
- Tripping Curve Type
- Energy Class
- ON-OFF Indication
- Catalog No
 P.S: Printing of MCB data may be placed as per the convenience of manufacturer. Model No. of every manufacturers are of different style. No standard definition format used but translated in easy words for easy understanding. for proper and more information related to MCB rating nameplate, use the provided Datasheet by the manufacturer of that MCB(s).
 Source : http://www.electricaltechnology.org/2015/08/how-to-read-mcb-nameplate-data-rating.html
Available link for download
Tuesday, November 15, 2016
CPU SpeedFan is software that can read temperatures
CPU SpeedFan is software that can read temperatures

Free DOWNLOAD
CPU SpeedFan is software that can read temperatures, voltages and fan speeds of computer components. It can change computer fan speeds depending on the temperature of various components. Fully configurable user events can be defined to execute specific actions based on system status.The main viewing purpose of SpeedFan is to show its user whats really going in their machine. When minimized, a temperature reading is showed on the button right of the desktop. When Speedfan is in an open window you can see a whole lot more. From Fan speed to total voltage, you can view any and all of the current fans.
Features of SpeedFan Free DOWNLOAD:
- Includes a tool for resetting motherboard clocks.
- SpeedFan monitors S.M.A.R.T. readings for EIDE, SATA and SCSI hard disks.
- Can display system variables as a chart and as an indicator in the system tray.
- Fully supports SCSI disks and can even change the FSB on some hardware.
- SpeedFan can find almost any hardware monitor chip connected to the 2-wire SMBus.
- Download SpeedFan (2.04 MB)
Available link for download
Subscribe to:
Posts (Atom)